1956 Packard Carribean Hardtop.

Mark Crowel

User of old school drafting tools; no CAD.
Jul 28, 2007
248
226
58
72
Southwest Michigan.
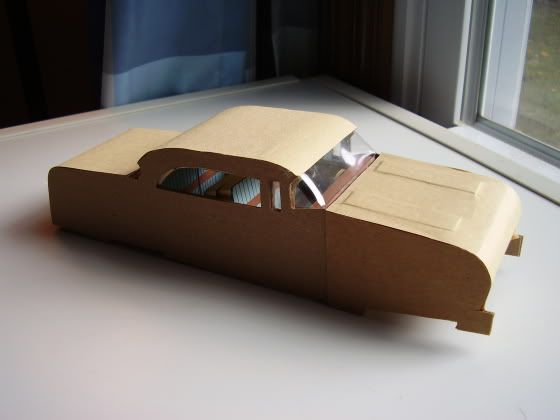
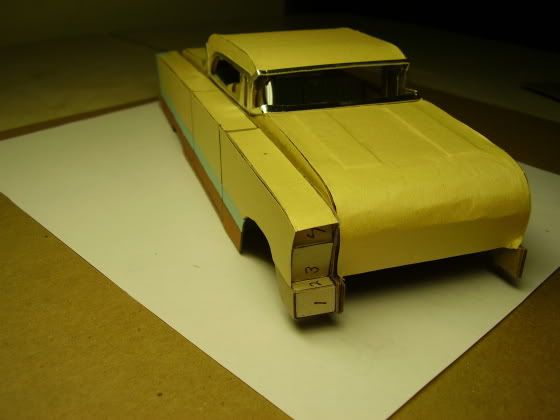
Those Caribbeans are indeed beautiful. I hope this model can come close to doing the real car justice.

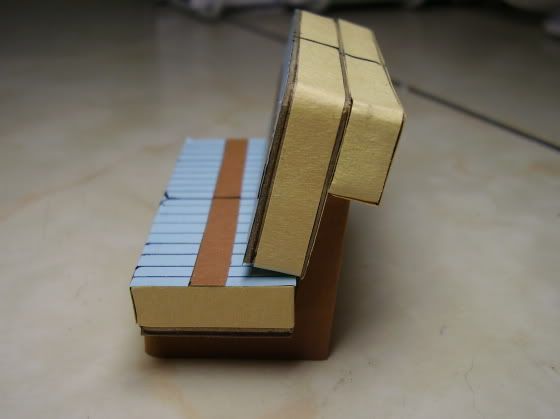
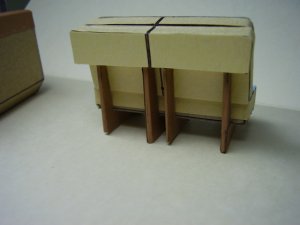
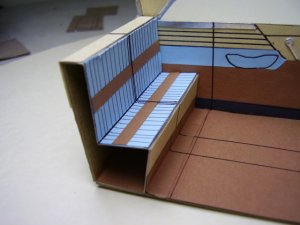
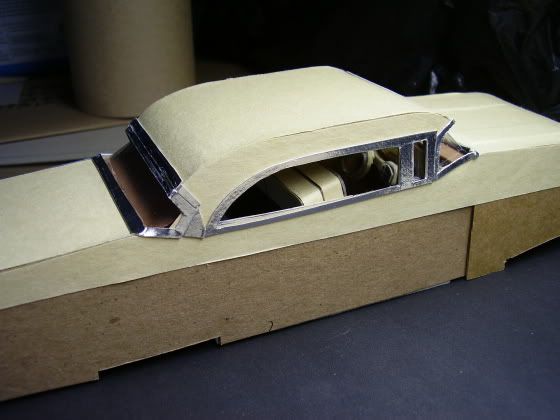
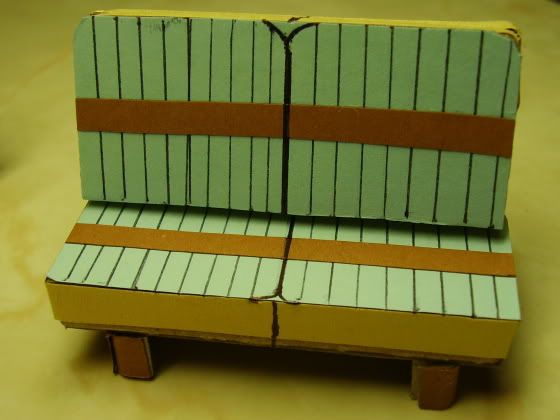
Instead of using the corrugated slabs (above posts)for seat cushions, I made the cushions and seat backs as strip-and-panel boxes. If I had used the corrugated pieces, I would have had to paper the fluted edges, and I still would have had to clad them with cardboard strips and panels.


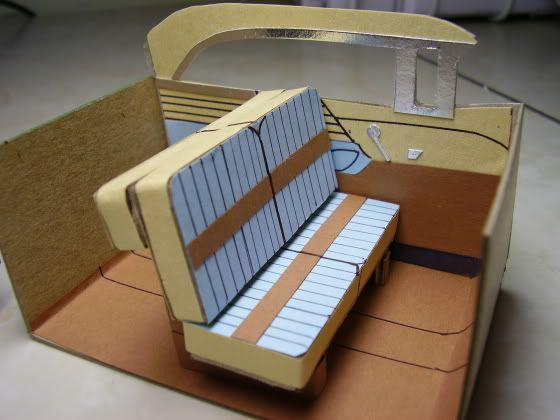
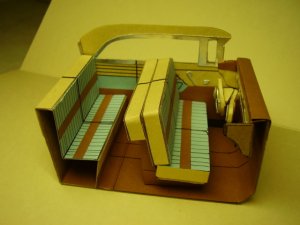
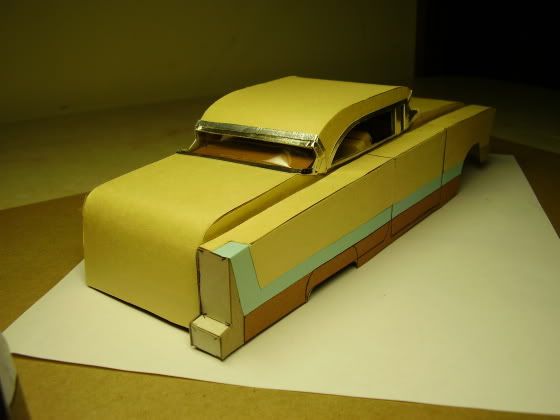
The front seat is done, and is dry test-fitted into the interior.

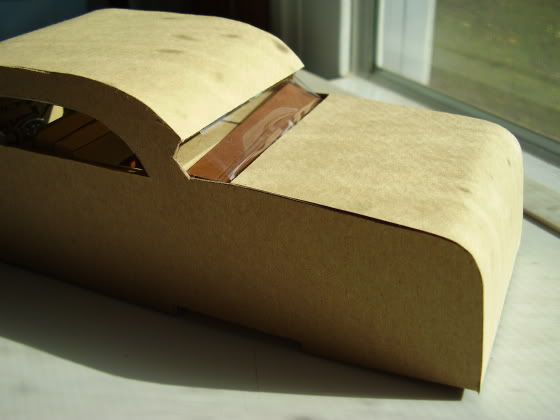
It seems to take as long to do an interior as it does to do an entire exterior.

completedfrontseatfromfront.jpg
 

Mark Crowel

User of old school drafting tools; no CAD.
Jul 28, 2007
248
226
58
72
Southwest Michigan.
I hope I did the backside of the front seat correctly. I was working from photos downloaded from the internet, plus factory photos from a book.
 

Mark Crowel

User of old school drafting tools; no CAD.
Jul 28, 2007
248
226
58
72
Southwest Michigan.
Dash, steering wheel, and rear seat.

I'm now convinced that I spend more time building the interior of a model car, than I spend building the body.

In paper modeling, we have to make the parts first, before we can glue them in place.

The steering wheel is a 1/16th inch wide strip of cardboard, covered in colored paper and coiled into a loop. Likewise the horn ring. Circular pieces (steering wheel center and dash guages) were made by a quarter inch punch and an eighth inch punch.

The stalk for the pushbutton automatic transmission control box is made from layered 1/16th inch wide strips, covered in colored paper. These strips were shaped to form the sides of the little transmission control box. The face of the box is a sheet of silver coated cardboard; the backside is regular cardboard covered with colored paper. The unit is oversized, and on my model you wouldn't be able to open that glovebox door with that control box in the way. but there's no way I'm doing THAT job over!
 

Attachments

  • Dash and steering wheel direct view..JPG
    Dash and steering wheel direct view..JPG
    97 KB · Views: 9
  • Dash and steering wheel from pass. side..JPG
    Dash and steering wheel from pass. side..JPG
    100.5 KB · Views: 10
  • Dash and front seat, and showing pedals..JPG
    Dash and front seat, and showing pedals..JPG
    102.5 KB · Views: 11

Mark Crowel

User of old school drafting tools; no CAD.
Jul 28, 2007
248
226
58
72
Southwest Michigan.
I discovered that I needed two more brackets on the back of the front seat.
 

Attachments

  • Four brackets on back of front seat..JPG
    Four brackets on back of front seat..JPG
    76.8 KB · Views: 10

Mark Crowel

User of old school drafting tools; no CAD.
Jul 28, 2007
248
226
58
72
Southwest Michigan.
With front and back seats. I still have a way to go with this interior.
 

Attachments

  • Seats and dash assembly in interior..JPG
    Seats and dash assembly in interior..JPG
    101.4 KB · Views: 12

Mark Crowel

User of old school drafting tools; no CAD.
Jul 28, 2007
248
226
58
72
Southwest Michigan.
I realize that the padding on the back of the front seat is much too thick, but I just don't have the heart to tear it off and do it over.
 

Mark Crowel

User of old school drafting tools; no CAD.
Jul 28, 2007
248
226
58
72
Southwest Michigan.
Installed clear plastic (from transparency covers) for the windshield and rear window. I cut it in one piece, then glued in the cardboard headliner to hold the "bridge" of the plastic in place.

Applied colored paper over the center body strip. For the hood scoop sculptures, I glued two cardboard strips to the hood prior to putting the colored paper down, and with a short ruler and a popsicle stick, worked the paper around the strips for a sculptured look.

colorstriponcenterbodyfrontanglewholeview.jpg
 

Mark Crowel

User of old school drafting tools; no CAD.
Jul 28, 2007
248
226
58
72
Southwest Michigan.
A side pontoon under construction. Edge to edge gluing of the cardboard.

pontooninprogressinsidesurfaces.jpg


Mark W. Crowel


Chrome trim (silver coated cardboard) around the windows.

sideviewofwindowchrome.jpg


Mark W. Crowel


The completed pontoon, with its color added (no chrome yet), dry test fitted to the center body section.

sideviewofcoloredpontoonwithcenterbody.jpg


frontanglecoloredponwithcenbody.jpg


Mark W. Crowel


rearanglecoloredponwithcenbody.jpg
 
Z

Zathros

Hey Mark, that's really coming along. This "Cubism" style is very interesting.
 

Mark Crowel

User of old school drafting tools; no CAD.
Jul 28, 2007
248
226
58
72
Southwest Michigan.
After about eight months of not working on this model, I've finally resumed. Not much progress, and it took a while to get my bearings with it again, but, at least I did something with it tonight.

Trim is now on the right pontoon. Tailight and rear bumper parts, and door handle are in place. A lot of tedious little parts to fuss with.
The door handle appears to be in an unusual spot, but spatially it's correct. On the real car, the door handle is at the top edge of the door sill, and, since the model does not have the lateral curve of the door (due to my basic strip-and-panel type of construction), the door handle is where the door sill meets the center body structure.
I have to repaper the front fender, because the front wheel arch is too high. The top bar of the chrome side trim has to go all the way across the top of the wheel arch.


__________________ Mark W. Crowel