1:18 Crichton build

ASC Mclaren

Well-Known Member
Nov 18, 2011
884
369
58
Western Washington
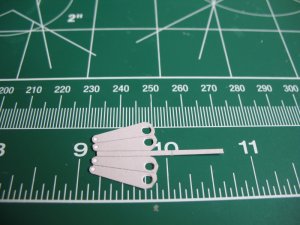
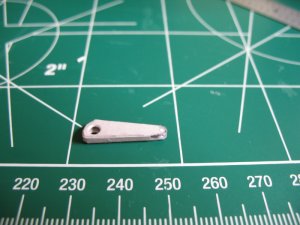
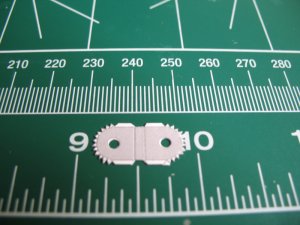
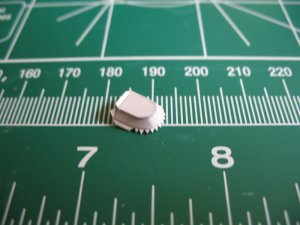
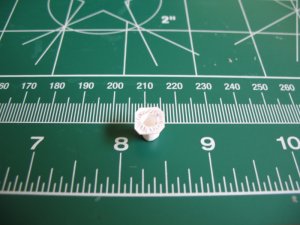
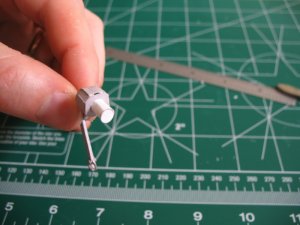
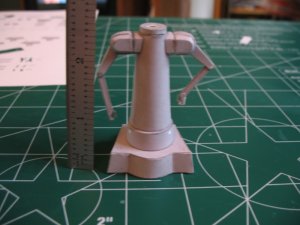
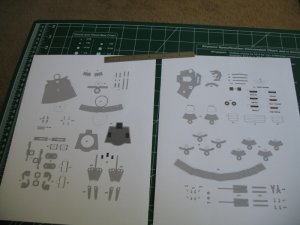
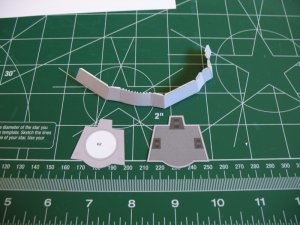
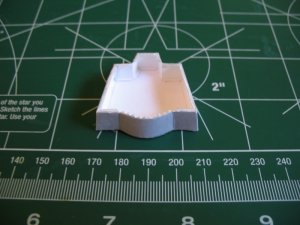
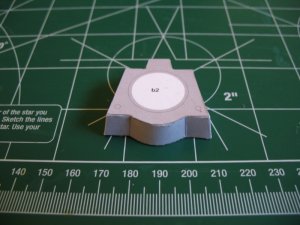
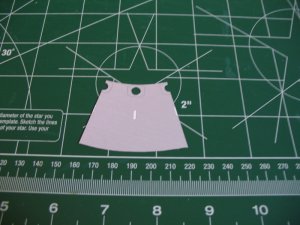
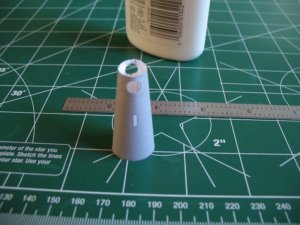
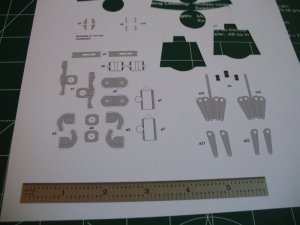
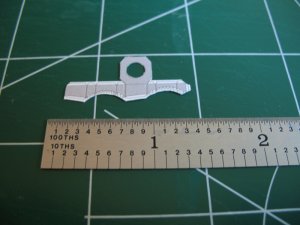
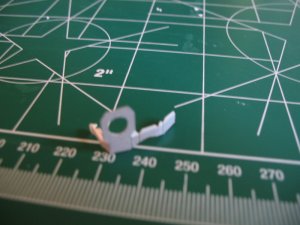
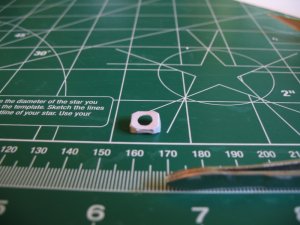
Hiya! I am chronicling my test build of Marcell's excellent Crichton model, from Buck Rogers in the 25th Century. His design is very intuitive and elegant! I did deviate from the design in one area, when building cylinders, I try to avoid an overlapping joint. So I made a tab to lap behind both sides of the joints on the round parts. Enjoy!
 

Attachments

  • IMG_2649.jpg
    IMG_2649.jpg
    122 KB · Views: 19
  • IMG_2652.jpg
    IMG_2652.jpg
    160.6 KB · Views: 6
  • IMG_2653.jpg
    IMG_2653.jpg
    127 KB · Views: 11
  • IMG_2654.jpg
    IMG_2654.jpg
    130.8 KB · Views: 15
  • IMG_2655.jpg
    IMG_2655.jpg
    137.7 KB · Views: 13
  • IMG_2656.jpg
    IMG_2656.jpg
    135.5 KB · Views: 6
  • IMG_2657.jpg
    IMG_2657.jpg
    111.8 KB · Views: 12
  • IMG_2659.jpg
    IMG_2659.jpg
    99.1 KB · Views: 10
  • IMG_2662.jpg
    IMG_2662.jpg
    111.7 KB · Views: 12
  • IMG_2665.jpg
    IMG_2665.jpg
    105.3 KB · Views: 6

Revell-Fan

Co-Administrator
Staff member
Administrator
Moderator
Aug 1, 2009
11,593
12,330
228
Vreden
Whoops, there you are! Now I see that you have indeed cut out the holes for the arms; from the perspective of the first pic in the other thread it looked as if the circles were still closed. The tab idea is good, I used the same technique on the big one. However, due to the small size of this model I deliberately added traditional tabs to the parts to simplify the build. Great start, pal!
 

ASC Mclaren

Well-Known Member
Nov 18, 2011
884
369
58
Western Washington
More progress:
 

Attachments

  • IMG_2666.jpg
    IMG_2666.jpg
    109.7 KB · Views: 8
  • IMG_2667.jpg
    IMG_2667.jpg
    110.4 KB · Views: 12
  • IMG_2669.jpg
    IMG_2669.jpg
    115.4 KB · Views: 11
  • IMG_2670.jpg
    IMG_2670.jpg
    133.4 KB · Views: 7
  • IMG_2671.jpg
    IMG_2671.jpg
    122.3 KB · Views: 15

Revell-Fan

Co-Administrator
Staff member
Administrator
Moderator
Aug 1, 2009
11,593
12,330
228
Vreden
:mrgreen::mrgreen::mrgreen::thumb::thumb::thumb::mrgreen::mrgreen::mrgreen:

Go for it, champ!

(I have a little surprise for you in the making! :cool:)
 

ASC Mclaren

Well-Known Member
Nov 18, 2011
884
369
58
Western Washington
And more:
 

Attachments

  • IMG_2672.jpg
    IMG_2672.jpg
    117.8 KB · Views: 16
  • IMG_2673.jpg
    IMG_2673.jpg
    126.1 KB · Views: 11
  • IMG_2674.jpg
    IMG_2674.jpg
    80.1 KB · Views: 12
  • IMG_2675.jpg
    IMG_2675.jpg
    84.5 KB · Views: 10
  • IMG_2676.jpg
    IMG_2676.jpg
    128.4 KB · Views: 7
  • IMG_2677.jpg
    IMG_2677.jpg
    121 KB · Views: 13
  • IMG_2678.jpg
    IMG_2678.jpg
    81.8 KB · Views: 18
  • IMG_2679.jpg
    IMG_2679.jpg
    82.3 KB · Views: 11

Revell-Fan

Co-Administrator
Staff member
Administrator
Moderator
Aug 1, 2009
11,593
12,330
228
Vreden
He's becoming alive! :thumb::thumb::thumb:

BTW, that's a brilliant idea: Skip the wall1wall1wall1 neck and use a pencil instead! It would have saved me MUCH time..! (No, just kidding! :mrgreen::mrgreen::mrgreen: )
 

ASC Mclaren

Well-Known Member
Nov 18, 2011
884
369
58
Western Washington
0Thank you all for the kind words! Tonight I start on the arms (gulp). I will say that so far, at this scale I have gone with gluing edges and skipping the smaller tabs.

BTW, I just got an excellent surprise from RF!
 

Revell-Fan

Co-Administrator
Staff member
Administrator
Moderator
Aug 1, 2009
11,593
12,330
228
Vreden
There will be more. I'm just figuring out the layout of the bridge and will send everything to you. :thumb:

If you have trouble assembling the arms don't hesitate to PM me and I'll send you a revision. :wave:
 

ASC Mclaren

Well-Known Member
Nov 18, 2011
884
369
58
Western Washington
Finished the arms. In the pictures you'll see my new hole punch :thumb:. That came in handy on this build. I found a6 problematic (may have been my lack of skill in rolling tiny tubes) although a round toothpick (which I use to apply glue) is about the right size. A3 requires patience! all of the arm joints hold well in an interference/friction fit. I did glue thumb and palms in place, as I couldn't find a small enough wire. I may fix this in the future.
 

Attachments

  • IMG_2680.jpg
    IMG_2680.jpg
    103.9 KB · Views: 12
  • IMG_2684.jpg
    IMG_2684.jpg
    104.2 KB · Views: 9
  • IMG_2689.jpg
    IMG_2689.jpg
    95.5 KB · Views: 10
  • IMG_2700.jpg
    IMG_2700.jpg
    112.1 KB · Views: 13
  • IMG_2701.jpg
    IMG_2701.jpg
    93.5 KB · Views: 9
  • IMG_2702.jpg
    IMG_2702.jpg
    119.2 KB · Views: 11
  • IMG_2703.jpg
    IMG_2703.jpg
    145.6 KB · Views: 6
  • IMG_2704.jpg
    IMG_2704.jpg
    123.9 KB · Views: 11
  • IMG_2705.jpg
    IMG_2705.jpg
    134 KB · Views: 6
  • IMG_2706.jpg
    IMG_2706.jpg
    114.5 KB · Views: 11

Revell-Fan

Co-Administrator
Staff member
Administrator
Moderator
Aug 1, 2009
11,593
12,330
228
Vreden
Holy frak - it lives!

:eek::eek::eek:

I'm really, really sorry for the small parts... Well, erh, no. Just kidding! :mrgreen:
You are doing a phenomenal job! :thumb:

Jason, you are surpassing my wildest dreams! It's good that you've found a matching rod. I'll add this to the instructions. Use whatever makes your work easier.