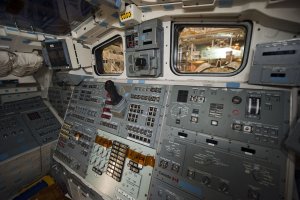
1:16 Space Shuttle flight deck
- Thread starter Tonino
- Start date
You are using an out of date browser. It may not display this or other websites correctly.
You should upgrade or use an alternative browser.
You should upgrade or use an alternative browser.
Just do not say the buttons on panels will do something too
WOW!It's a stickie now!
Well, this time I've done the central consolle. A piece very full of recessed switches. A lot of little boxes to build if you want to achieve the right feeling...
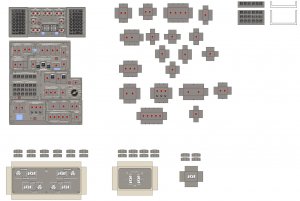
Here are the many parts needed to detail the consolle.
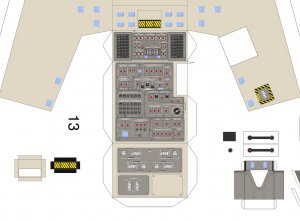
This is a complete view with the panels placed.
And, next, some close view...
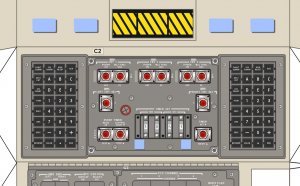
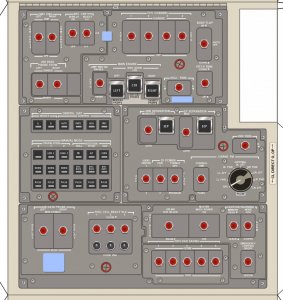
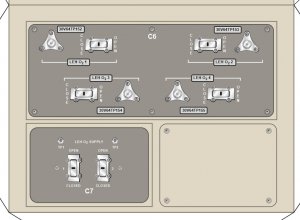
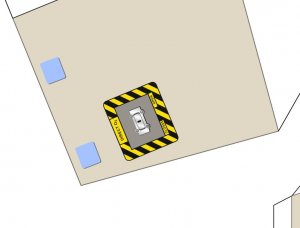
This is my drawing work for this week...
Sooner or later I'll start actually build something... I need to place my hands on some paper!
So much to do... and so little time...
See you next episode... we'll go in the rear.
T.
- Apr 5, 2013
- 13,499
- 9,551
- 228
HELP REQUEST!
Dear friends,
panel by panel I'm arrived to the aft section of the Endeavour and here I'm facing some trouble! My main documentation reference, till here, was represented by the schemes in Shuttle Crew Operation Manual that depicts all standard panels in extreme detail. Unfortunately some of them was not "standard" because they was mission specific and varied according to what payload and experiments were programmed for any single mission.
Now I am lacking details for some panels: L11, L12 and R12.
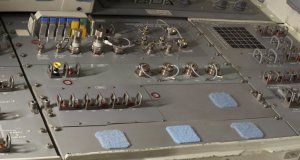
I have several photos taken on the Endeavour showing - more or less - most of the components to be included in the panels (but not all)

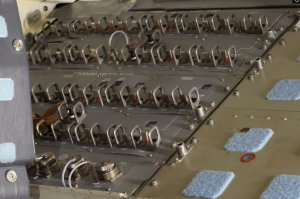
...and only few partial images taken during STS 134 from which I can desume partially what elements was actually fitted (but very little is viewable as the astronauts used to keep a lot of stuff scattered around the cabin)
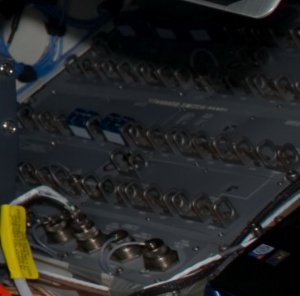
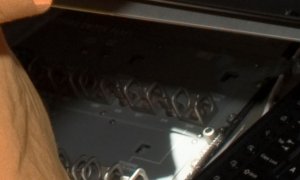
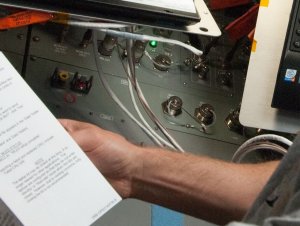
here we have L12, L12 again and then R12.
My help request is: anyone of you have or knows where to find photos, or even better, schemes and drawings showing the layout of those panels as they were supposed to be during STS134? (or, at least, during late Endeavour missions?)
Pleeeeeeeeeease!

Dear friends,
panel by panel I'm arrived to the aft section of the Endeavour and here I'm facing some trouble! My main documentation reference, till here, was represented by the schemes in Shuttle Crew Operation Manual that depicts all standard panels in extreme detail. Unfortunately some of them was not "standard" because they was mission specific and varied according to what payload and experiments were programmed for any single mission.
Now I am lacking details for some panels: L11, L12 and R12.
I have several photos taken on the Endeavour showing - more or less - most of the components to be included in the panels (but not all)


...and only few partial images taken during STS 134 from which I can desume partially what elements was actually fitted (but very little is viewable as the astronauts used to keep a lot of stuff scattered around the cabin)


here we have L12, L12 again and then R12.
My help request is: anyone of you have or knows where to find photos, or even better, schemes and drawings showing the layout of those panels as they were supposed to be during STS134? (or, at least, during late Endeavour missions?)
Pleeeeeeeeeease!
- Apr 5, 2013
- 13,499
- 9,551
- 228
- Apr 5, 2013
- 13,499
- 9,551
- 228
This is a 360 view able panorama, quite interesting. Link = http://360vr.com/2011/06/22-discovery-flight-deck-opf_6236/index.html
Some more pics:
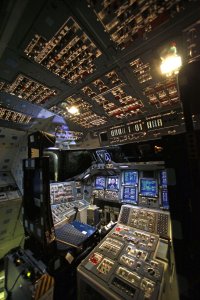
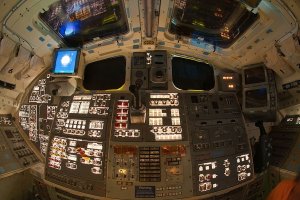
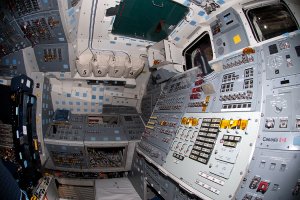
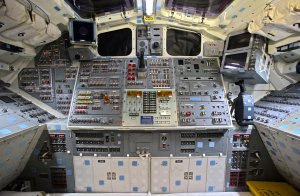
Some more pics:


Tnanks, Zathros. Nice pics. There is a lot of shuttle photos around, but every time I find something previouslu unseen... like some of the images you posted. It's all good reference material. Every photo is taken by a different angle so there is something to learn from anyone of them.
Unfortunately I wasn't able to find any official NASA reference about the mission specific panels mounted on STS 134.
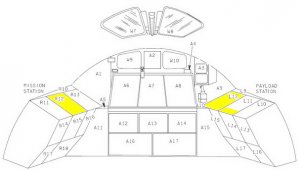
BTW, in my previous post I talked only about panel numbers without explaining where the panel really are. Excuse me, my mistake.
Here is the location of the panels for which I don't have complete references (yellow areas).
Anyway I completed left aft section. It was pretty difficult as, lacking schemes, I used only partial photo references to reproduce all the details.
All I was able to see in the photos is here. All the rest isn't. I preferred not to place any particular for what I don't have an actual image or drawing.
At the end of the work this is the complete rear-left consolle.
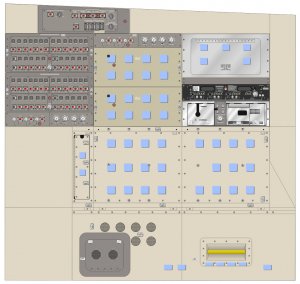
The lower section was completely redrawn on a totally cleaned surface.
But the piece of equipment I'm more proud of is the Multiplexer with the audio-video connections panel.
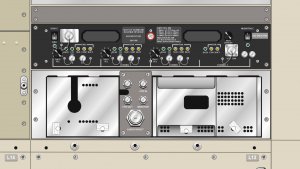
Even if no scheme was found of this equipment, I had a very good photo where almost all the labels were clearly visible.
The result is pretty realistic. I like it very much.
A different story is the L12: the "standard switch" panel
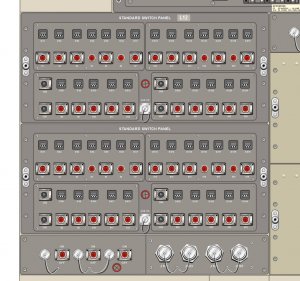
At every mission some templates was placed on the panels covering some of the little windows (not in use) and providing personalized labels for the switches with the functions they actually had in that particular configuration. I see only a little part of those templates in my photos so I should have added all the remaining detail based only on my fantasy. I preferred to leave the panels in their "base" configuration with no labels (except the numbering of switches and displays) instead of inventing.
Here is the lower section with some little doors and a handle I desumed from the great Gigapan Endeavour panorama (my main reference during most of my work).
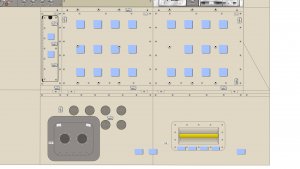
This is all for now. Next time I'll draw the right aft consolle.
Bye!
Unfortunately I wasn't able to find any official NASA reference about the mission specific panels mounted on STS 134.
BTW, in my previous post I talked only about panel numbers without explaining where the panel really are. Excuse me, my mistake.
Here is the location of the panels for which I don't have complete references (yellow areas).

Anyway I completed left aft section. It was pretty difficult as, lacking schemes, I used only partial photo references to reproduce all the details.
All I was able to see in the photos is here. All the rest isn't. I preferred not to place any particular for what I don't have an actual image or drawing.
At the end of the work this is the complete rear-left consolle.

The lower section was completely redrawn on a totally cleaned surface.
But the piece of equipment I'm more proud of is the Multiplexer with the audio-video connections panel.

Even if no scheme was found of this equipment, I had a very good photo where almost all the labels were clearly visible.
The result is pretty realistic. I like it very much.
A different story is the L12: the "standard switch" panel

At every mission some templates was placed on the panels covering some of the little windows (not in use) and providing personalized labels for the switches with the functions they actually had in that particular configuration. I see only a little part of those templates in my photos so I should have added all the remaining detail based only on my fantasy. I preferred to leave the panels in their "base" configuration with no labels (except the numbering of switches and displays) instead of inventing.
Here is the lower section with some little doors and a handle I desumed from the great Gigapan Endeavour panorama (my main reference during most of my work).

This is all for now. Next time I'll draw the right aft consolle.
Bye!
- Apr 5, 2013
- 13,499
- 9,551
- 228
I guess we will all be able to operate the orbiter once this build has been completed. 
@Tonino : If I were you I would choose a good view at the missing 134 panels from another STS mission and use them as a place holder in order to complete the design. Mark the panels in the instructions and state that these are not from STS-134 because of the lack of references. So you may keep track on them and may easily replace / update them once the desired information pops up one day.
@Tonino : If I were you I would choose a good view at the missing 134 panels from another STS mission and use them as a place holder in order to complete the design. Mark the panels in the instructions and state that these are not from STS-134 because of the lack of references. So you may keep track on them and may easily replace / update them once the desired information pops up one day.
Thanks all for your appreciation words. Perhaps I'm exceeding with my "search for perfection" but I cannot resist, when I dig in some new project I became a little maniac 
@Revell-Fan : Good idea! I just gave it a try. Unfortunately almost all of the mission photos I've found around show only a big mess of intrumentation (videocameras, laptops, checklists, timers and cables-cables-cables...) all dropped around on all the available surfaces. And the most preferred by all astronauts seem to be exactly the rear consolles, just where I need to peek... But I had another idea...
I've just read what I have written above... the magical word is "checklist" !!!
I've performed a search with keywords "STS134" and "checklist" and obtained, as a result, a LOT of mission-specific documents (here is the site)
From a first sight there seems to be a lot of references to instrumentation actually used on board... I'll give a deeper look an see if I can fill some of the "black holes"!
Stay tuned: right consolles on the way!
@Revell-Fan : Good idea! I just gave it a try. Unfortunately almost all of the mission photos I've found around show only a big mess of intrumentation (videocameras, laptops, checklists, timers and cables-cables-cables...) all dropped around on all the available surfaces. And the most preferred by all astronauts seem to be exactly the rear consolles, just where I need to peek...
I've just read what I have written above... the magical word is "checklist" !!!
I've performed a search with keywords "STS134" and "checklist" and obtained, as a result, a LOT of mission-specific documents (here is the site)
From a first sight there seems to be a lot of references to instrumentation actually used on board... I'll give a deeper look an see if I can fill some of the "black holes"!
Stay tuned: right consolles on the way!
I was lucky! Flipping through the STS134 documents I've found several schemes and procedures involving the previously undocumented panels. I was able to complete most of the labels not visible in the photos.
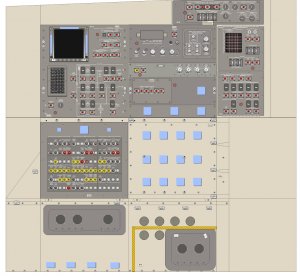
Now I can declare finished the drawing work on the right aft section... and here it is:
The R11 was one of the easiest tasks... many elements already realized for other panels was ready for use.
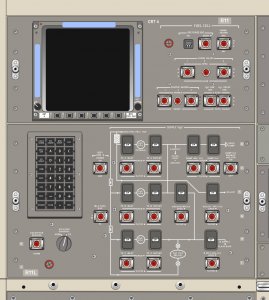
The R12 was finished thanks to the NASA flight data files. Now it is almost identical to the original.
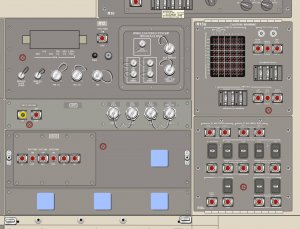
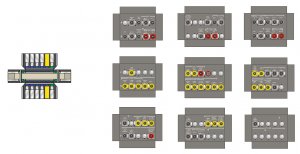
The R14, as for the central consolle, has many recessed sections so I prefer to realize some boxes to give the desired "3D feeling"
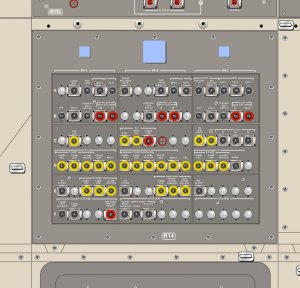
And here they are... The other thing to the left has to be placed on the R12 panel.
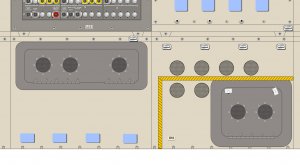
Finally a look to the lower section.
Now it's time to go fully aft and complete the last side of my cabin still waiting to be covered with panels...
Bye!
Now I can declare finished the drawing work on the right aft section... and here it is:

The R11 was one of the easiest tasks... many elements already realized for other panels was ready for use.

The R12 was finished thanks to the NASA flight data files. Now it is almost identical to the original.

The R14, as for the central consolle, has many recessed sections so I prefer to realize some boxes to give the desired "3D feeling"

And here they are... The other thing to the left has to be placed on the R12 panel.

Finally a look to the lower section.

Now it's time to go fully aft and complete the last side of my cabin still waiting to be covered with panels...
Bye!
Hi friends!
Here is my first 2017 update.
I'm still drawing.
I start to wonder when - finally - I'll manage to build something real. As this is the last side still to cover with panels, perhaps that moment is not so far from here...
Here are my aft panels (upper section):
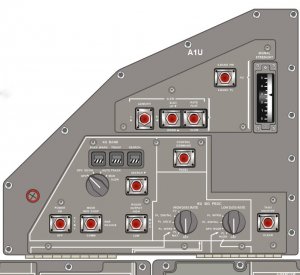
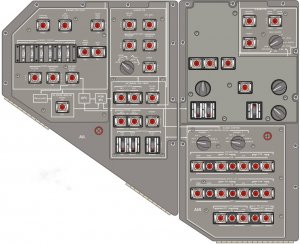
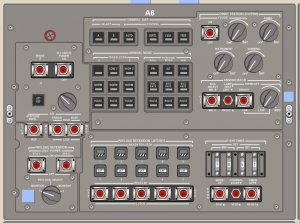
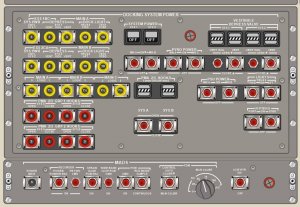
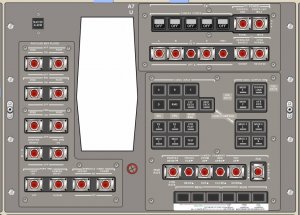
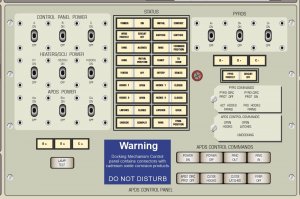
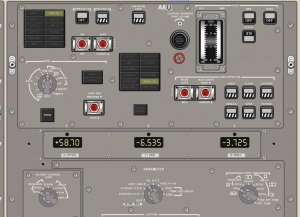
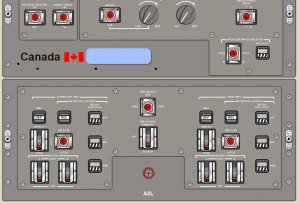
And, finally, a complete view of the aft upper consolle
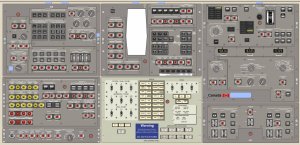
Now working on the lower section of the same wall.
See you soon.
T.
Here is my first 2017 update.
I'm still drawing.
I start to wonder when - finally - I'll manage to build something real. As this is the last side still to cover with panels, perhaps that moment is not so far from here...
Here are my aft panels (upper section):


And, finally, a complete view of the aft upper consolle

Now working on the lower section of the same wall.
See you soon.
T.


 )
)