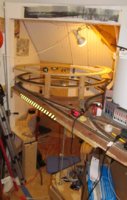
Eastern Tn logging on the DG CC & W RR 1928

Bill Nelson

Well-Known Member
Dec 14, 2008
2,680
467
78
Clarksville Tn
Text below photo

aahelix3rdlvla.jpg

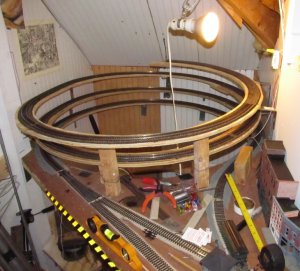
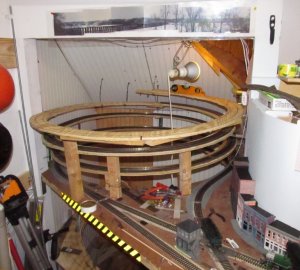
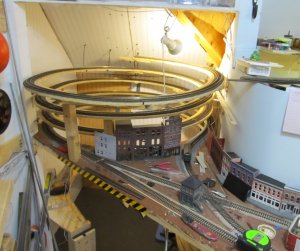
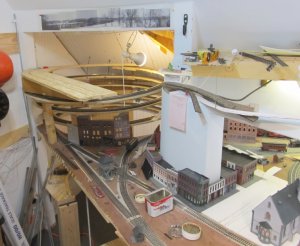
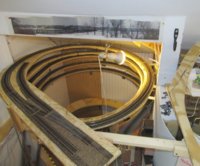
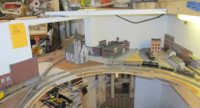
I have installed the roadbed for the next level. the left side of the helix goes down. the track there has a 21 inch radius. and I am aiming at matching the ruling grade on the RR which is now a nominal 3.3%. going up to the right the track also has a 21 inch radious as far as the right rear corner of the helix nook, whre the radius reduces to 20 inches. when a tangent off the track up is parralel with the left wall of the helix nook on each of the first two rounds I have added a two inch straight section, so this current level of sub roadbed is three inches out from the center line of the original 21 inch radius circle , This outward creep of the helix is needed to provide clearance for this level and up, as the sloped ceiling of the helix nook is encountered. I'm not 100 % sure this will be enough, I'll have to extend the roadbed to the back wall, and check the clearance. I may have to add a little to the straight section. from here on out, the helix's skew forward will probably have to increase to 3 or 4 inches per loop. I will have to do some mocking up, and carefull measurement. I want the helix to be as far back as possible, retaining enough clearanc against sthe sloped ceiling. I have run into some of the same calculations on my narow gauge shelves, and it is tricky. another turn or two of the helix may be all I can fit up there, as you can see the right side of the helix nook starts to narrow very soon two. that angled 2x6 has metal roofing screwed to the other side of it, so it will not get altered for the sake of the layout.

The top of the backdrop will be the bottom of the upper level bench work . the helix won't even get me that hight, so I am going to have to have some lowered thin benchwork to suport the track as it wanders up to the upper level. I don't have that figured out scenicly yet, and that will be a problem. The upper reaches of the center peninsula will be my best oportunity for mountain scenery, so I will want to do it right. there is the danger that it will get crowded up there though, as I will have the mainline rising up and then looping back to the east wall. I need a wye on the main, so I can turn passenger trains, so they can back into State line on the upper deck, Off the one leg of the wye that does not lead to the main line I am going to have a logging branch that goes up to meet the narrow gauge for a log reload. Ideally that should be over in State line near the coal and Iron ore reload, but there is no room. that branch can give ne an excuse for a short section on track with grades steep enough to watrrant my geared power. And on top of those elements the narrow gauge will have to climp from a few inches above the standard gauge main line up to some twenty inches or so higher to match up with the narrow gauge shelf hanfging on the ceiling, so I will have lots of elements to balance.
 
  • Like
Reactions: zathros

Bill Nelson

Well-Known Member
Dec 14, 2008
2,680
467
78
Clarksville Tn
acushionedfloormatsforhelixa.jpg

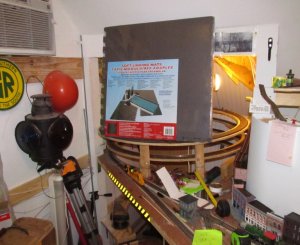
It is a tight squeeze under the helix to work in there. I have a lift out for the lowest level, that will have a return loop with a passing/staging siding ocupying the helix nook at the lowest level. the liftout is a piece of 2x6 that fits into a slot on each end of the lowest level, sipported by 2x6 support members, it is stout enough to withstand large people crawing in there. the hard plywood floor of the helix nook hurt my knees when I work in there so I got this cushioned floor mat material for the floor of the helix nook, so it won't hurt my knees when I crawl in there to do construction or maintenance


Earlier this week I had extended the roadbed as far as the sub road bed went, and installed my last three sections of Peco code 100 flex track. I have a pile of Atlas code 100, salvaged from my old Southern staging yard, but I don't want to use the Atlas track on the helix up, as it is much harder to get down in a perfectly smooth curve with no kinks. I may use some of the Atlas track on the lower sections of the helix down, as it transitions toward the new Southern staging. that area will be less critical, as the radius will be considerably more civilized. I'm pushing things somewhat on the helix up, with a 19 inch radius, and a 3.3% grade. it is very civilized, but only as compard to the old Mountain division, which had 18 inch radiuses, and 8.5% grades in places. When I first started planning this rebuild of my RR I was thinking I could run considerably longer trains. reality has crept in though, as my sidings and yards are not much longer ( With the exception of on humongoulsy long passing siding in Harlow, the sidings at the passenger station, which are not only longer, but work reliably, and the future massively larger Southern Staging) If by chance the infrasturcture of the new RR will handle longer trains , it will take me years to expand my fleet of cars, as at this stage, track and lumber have been devouring my budget, and soon buildings and scenery will be doing the same. I have been overspending on track and switches, so train budjets over the next year or so will have to be smaller. hopefully with the new RR design I'll be happy spending more time running trains, and won't be to bothered by the budjetary restrictions on new projects.

Last night I cut another ofset circle up, so I can add subroadbed and roadbed up a level, and then use my clearance gauge to see if another round is possible. if I can do another round, likely the ofset will have to be huge, pushing the outside edge way out into the aisle, so I will have to weigh the pros and cons of another round of helix vs having the rest of the climb off the helix. the first track off the helix will be hidden track, with a passing siding, to ease operations, and help reduce the track clutter on the top deck, which will be busy, with a wye on the standard gauge, a logging branch to a reload off the narrow gauge, and the narrow gauge climbing up to the outragiously tall top shelf; it will be tricky to get all of those elements in with some impressive mountain scenery without making things look crouded.

enough documentation, time for me to go to work!

Nelson


a_helix_3rdlv_w.trk_a.jpg
 
  • Like
Reactions: zathros

Bill Nelson

Well-Known Member
Dec 14, 2008
2,680
467
78
Clarksville Tn
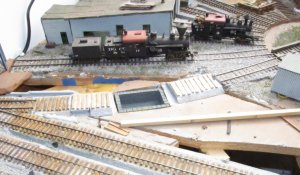
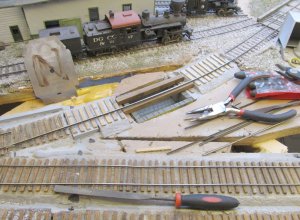
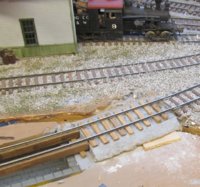
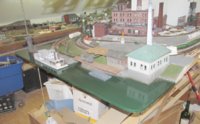
When I put the Harlow engine facilities in the window seat area under my skylight, it solved a big space issue with the Harlow rebuild, as the enginefacilies would have been a very tight fit anywhere else. splicing the pieces togeteher, I had about six inches of roadbed to add to the aproach to the turntable. this gave me room to put in an ashpit. today I cut some new ties. that stick of wood in front of the pit will be cut down to make the beams that will support the rails over the pit. the wood is just as tall as the roadbed. so I need to cut the beams to size, stain them, and then I can use ties as shims under the beam, which will bring the beam up flush with the top surface of the ties, so I can spike down a short section of code 55 to hook up the engine facilies. the control panel was a part of the fashia, and was destroied when old harlow was dissasembled, so I will need to make a new control pannel with slide switches to turn off the various leads off of the turntable . I will also try to have two seperate isolated tracks on the turntable lead with a magnetic uncoupler between them, so I can easilly assemble and dissasemble pairs of engines for doubleheading

a_new_ties_at_harlow_engine_facilities.jpg


a_second_to_the_last_helix_round.jpg

on the other end of Harlow the roadbed is most of the way up the helix. the next piece of roadbed will have just under a half circle of 19 inch radius. and then come off the helix parralell to the front of the layout still climbing at an aproxiamtely 3.3% grade, shortly after the track straightens out I will have a passing siding, which may end up as partially hidden track.

the panoramic photo above the helix nook was taken in my front yard in December of 1987, the Day we brough the newborn #1 son home from the hospital; showing the trestle approach to the L&N's old Memphis line's bridge over the Cumberland at Clarksville TN. the stub end of the old memphis line is operated by the R. J. Corman Railroad Co between Guthrie Kentucky, and Cumberland City TN. the trees have grown up a lot since then.


Bill Nelson
 
  • Like
Reactions: zathros

Bill Nelson

Well-Known Member
Dec 14, 2008
2,680
467
78
Clarksville Tn
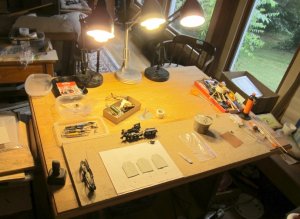
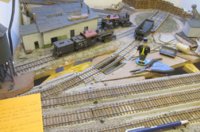
The excavations on the work bench are complete. we did have to wait for an inspection from the state archeologist to insure no pre Colombian rins were disturbed. Items from the last level of the work bench were left on the workbench for continued work, including a brass Ken Kidder Porter Mogul that was my Mom's. At a hobby shop when I was a kid, my Mom admired it, and Dad bought it for her. She kept in on her Jewelry box, and would not let me run it, which annoyed me when I was 12 or 13. It is mine now!. I have reworked the electrical pick up, like almost all small old locomotives need. I had remotored it, but the replacemt motor had clearance issues with the firbox, of the locomotive. I had bought an A-Line motor for possible use in the Rivarossi Hiesler I an (unsucessfully so far) trying to equip with a Tsunami for use at the club. It's current motor, with the tsunami, pulls too many amps, and kicks the circuit breaker on the club layout. the A line motor was way too small, but will fit nicely in this 2-6-0, which I need to repaint. it is lettered for the SP on one side, and the Texas, New Orleans, and Pacific on the other. My Mom grew up in New Orleans, so that may be what atracted her to it. the little A line motor is a perfect fit, and I have NWSL cardigan shafts with cups that fit the locomotive shaft and the motor shaft (That never happens); so the remotoring should be easy. the lasty post on Zealot about this locomotive was
on oct 8 of 2011.

also on the bottom of the pile are the south wall od the Crooked Creek engine houe's doors. the entire building is scratchbuilt, as are the doors. I have one hinge scratchbuilt for the doors, and need 11 more , The last Zealot post on the Engine House was on 4 13 2011. I will need to fire up that project to try to get it off the workbench soon. when my workbench is clear I have a boatload of buildings to build for the new Montgomery furnace, some factory buildings for the Iron works , some stores for the town, and some company houses. it will be a lot of fun. most of the kits I will build pretty much straight up without much kitbashing, so it should go quickly.

a_workbench_06_20_14.jpg
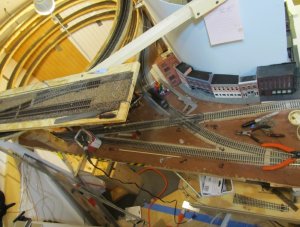
On the Helix, I got track down on the last full circuit of the helix, so when I ad the last 1/2 round minus seven inches, and come off the helix close to parralell with the front of the near ailse opening the currnt track will extend outside the top level so I won't have to work under the roadbed anywhere putting in track. So far the peco code 100 flex I have used is very smooth and even, with no kinks, or gaps in the rail joints. this nook gets kind of hot, as it is close to the metal roof, I might have some gaps open up in the winter as the rail shrinks


a_helix_06_20_14_almost_done.jpg
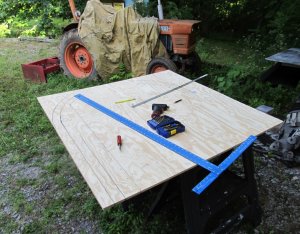
In the photo below, I am plotting out the top 1/2 turn of the helix, minus seven inches, which hopefully will bring the roadbed off at a tangent that is roughly parralell to the front of the lauout. . As the track straightenms out, I'm making the roadbed seven inches wide, to support a passing siding with some fumble room on either side. supporting this roadbed will be tricky, as I'm thinking it will be below the level of the upper deck benchwork, so I may have to do some fancy carpentry, possibly suspending the roadbed from some benchwork up above, don't want to obstruct the view of this triangular sceane at the end of Harlow.

a_plotting_the_last_half_roundof_the_helix.jpg

Nelson
Here are the basic tools that have allowed me to make the Helix so accurately, even as the radius decreases from 21 inches at the bottom to twenty inches, and then to 19 inches, while skewing forward to clear rhe sloped ceiling in the back of the nook The T bar is designed for plotting out cut lines on sheetrock, and is very usefull. I have a bar of aluminum that I have drilled a pivot point hole in one end. I use a sheet rock screw to hold that end in place to mark the center of the radius. I have holes drilled through the bar at one inch intervals from 16 inches up to 20 something inches so I can draw the center lines and the cut lines perfectly. I draw the center lines on the good side of the plywood. at the pivot point for the home made radius bar, I drill a hole through the plywood. after marking the center line on the top side of the plywood, I flip it, and use the radius bar to draaw the cut lines as needed, and then cut from the back side, so the rough edge is on the underside of the roadbed, and does not interfreare with putting down the cork or homeabed roadbed. I have been using cork on my hidden track and in background sceanes, and been using homeabed where the track is close to the layout edge near eye level. I'll need to order some more homeabed for the upper deck will be building upper deck benchwork soon! this is exciting!!
 
  • Like
Reactions: zathros

Bill Nelson

Well-Known Member
Dec 14, 2008
2,680
467
78
Clarksville Tn
a_off_the_hekix1a.jpg
I am test fitting the last roadbed on the helix, which will continue at the aproxiamte 3.3% grade up toward the upper deck, as it spreads to accomadate a passing sidinglong enough to hnadle the longest trains on the Mountain division. Trhe length of this passing sidding may well determine the longest trains allowed on the mountain division. I have to mark and cut a notch into the roadbed to alow it to fit snuggly against the helix nook's north door opening, and I left some overlap of the 19 inch radius on the back side to allow me to adjust it a little to get the angle of the track as compared with the outside edge of the middle deck underneith it. Up against the north wall it extends out some from the lower deck, not a problem there, as that should be place wher operators will seldom need to go if there is no problem. I am adding an extra inch on the inside and outside of the roadbed to allow some fumble room, as if something needs to be put on or off the rails on the upper deck, this will be the most accesable point


a_main_line_crossing__a1a.jpg

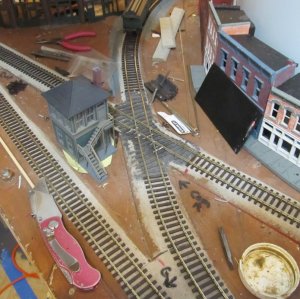
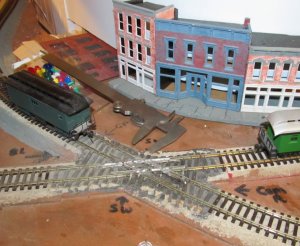
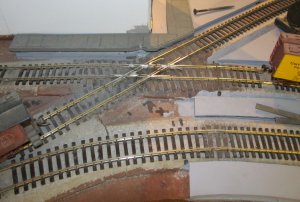
Before I install the roadbed ont the last section of the Helix, and begin the last of the climb up to the height of the upper shelf on the east wall, I need to get the gaurd rails and gaps done on this mainline crossing ; where the Southern Mainline closing the Southrn's Harlow Return Loop crosses the DG, CC, & W RR's main line South out of Harlow, up the mountain towards Ridgemont, and eventually State Line Ga. No way do I want to be installing the gaurdrails and gaps after the upper deck is installed. The crossing is smooth in all directions right now; hope I don't mess it up much putting in gaurd rails. the track right there is code 100, and I'm thinking I will use code 83 for the gaurdrails, so they will have a good look, but be out of the way, and less likely to cause problems.


Bill Nelson
 
  • Like
Reactions: gbwdude and zathros

Bill Nelson

Well-Known Member
Dec 14, 2008
2,680
467
78
Clarksville Tn
a_number_4s.jpg
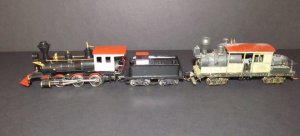
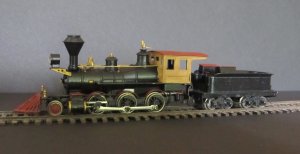
I have been working on an old Ken Kidder Porter Mogul that belonged to my Mom. I have rebuilt the electrical pick up, and remotored it. I need to hook the wires up to the motor, screw it back together, adding the pilot truck, and paint the tender trucks red. it is shown ere with my old #4, which is going to go to the Strong and Perry Lumber co, to be their #1.
acrossing_done_track_on_top_deck.jpg
I have tack starting to go in on the beggining of the upper deck. I have been working to finish the crossing, before there is an upper deck on top of it to make the job more difficult. the crossing is dead smooth on the Southern track, and a little bumpy on my main, but best I can tell it is flawless. I'll now soon, as with the crossing done, I can hook up the downtown Harlow block and the Helix block, and run trains over here. for a while i will have the power cheated into the crossing, so it will run on my main line. the final controls will be hooked up with some switch controls, and the electrical work will be tricky.


Nelson


a_crossing_a1a.jpg
 
  • Like
Reactions: zathros

Bill Nelson

Well-Known Member
Dec 14, 2008
2,680
467
78
Clarksville Tn
Today I got a wire solderd to each of the four corners of the crossing, one corner will always be powered for the inside rail and one will always be powered for the inside rail. the other two will vary depending on weather the crossing is powered for the Southern Rwy main, or the DG, CC, & W RR main. I will use a blue point manual switch conntrol for where the Southern splits off my mainline. it comes with a DPDT switch built in to power the frog if needed, and I can use that wired as a reversing switch to power the two remaining sides of the crossing . Next I need to put in the gaurd rails and gaps on the other crossing, where the Southern Main crosses a lead to several industrial sidings on the back side of Harlow.

I am getting a lot closer to being able to hook up the power to the Helix block, and to the Downtown Harlow block. The Herlow yard block already has power to it.

Nelson
 
  • Like
Reactions: zathros

Bill Nelson

Well-Known Member
Dec 14, 2008
2,680
467
78
Clarksville Tn
a_ken_kidder_2_6_0a1.jpg
It's alive!! running with it's new motor, and greatly benifiting from improved electrical pick up, repainted and polished up, My Mom's old Porter mogul Just needs it's tender trucks painted red, and it will be ready to go. I may letter and number it for my #4 My old #4 a westside models horizontal boiler Class A Climax, needs to go into the shops as one of the cardagan shaft cups in it's drive train is spinning on the shaft. Likely it will come out of the shops painted and lettered for the Strong and Perry Lumber Co. a smaller outfit with some trackage rights up on Iron Mountain.


a_turntable_lead_rail1_a1a.jpg
I have not found any code 55 railjoiners, but I have found some N scale joiners that will work in a pinch. I have one rail in on the lead to the turn table, over the new ash pit. I need to go into the turn table area with a multimeter, and figure which rails are common, and which are switched. the old control board was on the fashia of the old layout, and was a casualty of the removal of old Harlow. I will need to add a new piece of fachia to mount thr switches needed to turn the turntable, the turn table leads, and two sections of track on the main turntable lead, with the joint on the uncoupling magnet, so I can build up or take apart pairs of double headed engines easily.
a_second_crossing_a1.jpg

I got the gaurd rails installed on the crossing between the industrial spur on the back side of Harlow, and the Southern Mainline. I just need to add four power leads to the corner. one will go to the inside rail lead, and another to the outside rail lead, the other two will be hooked to the DPDT switch built into the blue point controller for the nearby switch where the Southern Main leaves my main line on the back side of Harlow, wich will be wired as a reversing circuit. When the switch is thrown to the Southern both crossings will be powered for the Southern, and when thrown for the DG CC & W RR, both crossings will be powered for my RR.


I'm going to have to re work the sidewalk on the bank, the heat from soldering the crossing melted the foam sidewalk.

Bill Nelson
 
  • Like
Reactions: zathros

Bill Nelson

Well-Known Member
Dec 14, 2008
2,680
467
78
Clarksville Tn
a_helix_7_5_14a1.jpg

I have the helix nook filled up, and am beginning to come off the helix. the Strong and Perry lumber co, a samll water powered mill will fit up in here, allong with the Perry's Gizzard station. I'll have to see what else will fit.


Nelson
 
  • Like
Reactions: zathros

Bill Nelson

Well-Known Member
Dec 14, 2008
2,680
467
78
Clarksville Tn
a_shimming_the_aproach.jpg a_turntable_aproach_redone.jpg

I got the rails into the turmtable , over the new ashpit. the roadbed did not line up right, and long wheelbased rod locomotives derailed there, so I ran a putty knife under the roadbed just before the joint, and shimmed the roadbed up, which seems to have fixed the problem. I had a short when the switch was thrown to the tuntable. Never did find exacltly what the problem was, but I disconected all the wires to the turntable lead, the turntabe lead's switch, and the ground throw. tested everything, and when I hooked everything back together I no longer had a short.

I have been pulling out locomotives, and running them in the Harlow Yard area, looking for problems with the track. My track cleaning cars and one of my shays derailed on a curve on the mainline, in a place that had code 55 rail, and the spikeheads were too big, and contacted the flanges. I replaced a section of the outside rail with code 70 rail, and that section of track is operating flawlessly, even though one rail is 15 thousanths of an inch taller than the other. I have a few more wires to hook up to one of my homemade crossings, and then I will be ready to wire the Downtown Harlow block and the Helix block. at that point I will have five working blocks, and can have fun moving trains, while I proceed with track on the upper and lower deck.


Nelson
 
  • Like
Reactions: zathros

Bill Nelson

Well-Known Member
Dec 14, 2008
2,680
467
78
Clarksville Tn
a_north_harlow_planing.jpg

I have the foam core streets in North Harlow painted and glued in place. they will be dadded on to in places, and skimmed with vynal spacling to fill gaps and add tecture. under the curch is a pice of newspaper that was used to make the tempalte for a piece of foam that will raise the church up about a half an inch, to give a tiny bit of scenic depth to this scene, wich built on a sheet of plywood, is way too flat.

Besides doing some scenic work in Harlow, I hooked up the system wide ground buss to Harlow, and the Harlow control lead from the control panel in the dispatcher's desk. I can run trains on the Downtown Harlow block now, although I have not yet wired the crossings where a siding and my South/east main crosses the Southern's westbound main. without those crossings I can operate the largest prtion of track in Downtown Harlow. I did miss one place in the passenger stations two tracks that needs a gap. One would think that with fourty years of using power routing switches I'd know exactly where I'd need gaps, but sadly, possibly due to Oldtimer's syndrome. I missed one. But trains are rolling in Harlow, as long as one the switches at the Harlow Union Station are not thrown in the wrong direction. I have a plan for wiring the crossings, and if that works well I sould be able to go on to hooking up the Helix's block (Which may be relabled Perry's Gizzard in honor of that now missing, and sorely missed , section of my old mountain division)


a1a_first_train_at__harlow.jpg

WEhen I hooked up power to the Downtown Harlow block, I had been testing various locomotives in the Harlow Yard block to see if they had any difficulties. # 5 was the locomotive on a hot section of track, and so it found itself the first locomotive into the Downtown Harlow block under it's own power. #5 is a hodgepodge locomotive. It has A Mantua General frame, a Carry conversion boiler, a MDC tender with a cannon coppier motor spliced in. it is a fine running locomotive tant almost no one is able to figure out it's provenance.
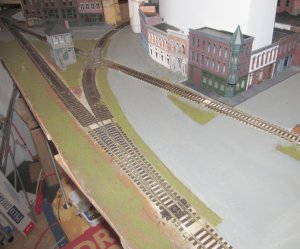
Oddly i live allong the old L&N Mempis Line. I bought a book about the memphis line; and in that book was a photo of a locomotive that looks almost identical to my #5
 
  • Like
Reactions: zathros

Bill Nelson

Well-Known Member
Dec 14, 2008
2,680
467
78
Clarksville Tn
a_harlow_church_7_27_14.jpg

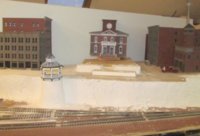
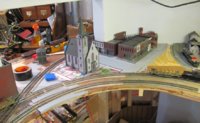
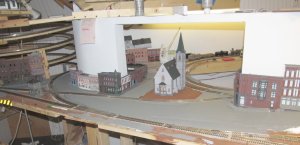
since I have parts of the harlow block operational ( need to do some more wiring) I have been vavuming the area and doing some basic scenery work. I recently got the church in Harlow placed. it is kitbashed from a European kit ( a build log is in the later stages of my Bashing a church thread in the scratching and bashing section). a prominent feature of my current central penisula is this opening in the central back drop that allows the Southern Railway's mainline to fold back on itself to make a return loop, so Southern Trains can come and go through Harlow as they bring in interchange trafic. the curch is prominently visable from both aisles, down near the north wall where the center penisula is the skinniest


a_harlow_church_7_27_14_b..jpg

In my old layout's design, Harlow was four feet by six feet. the 18 inch radius,, code 55 rail, and very cramped trackwork made the area very difficult to operate. all the space below on what will be the center level is harlow , as well as what is on the other side of the central backdrop. the main has a minimum radius of 21 inches, and where the Southern shares my main line the track is code 100. my main elsewhere is mostly code 83, as are all new sidings. some code 55 remains, along with some code 70 in the handlaid yard and engine terminal area.


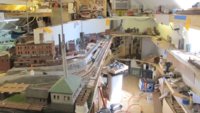
I have a little more electrical work to do on the Harlow area, and then I will wire the Helix block. after that, I can work on extending the track past the Murray block on the lowest level, work on the Southern Staging block, or start building the upper deck benchwork next. there would be operational plusses to each course of action. I will need to weigh them against the time needed to get to some basic operations in each of those areas, so I can get the most done with the least amount of effort and time.


Nelson


a_harlow_7_27_14.jpg
 

Bill Nelson

Well-Known Member
Dec 14, 2008
2,680
467
78
Clarksville Tn
a_8_6_14__whole_river_front1a.jpg
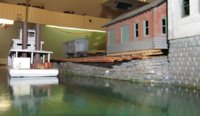
made some progress on the riverfront, added future floor polish on top of the polyurathane finish over the painted acrylic surface of the water
a_8_6_14_river_front1a.jpg
I have the deck for the rail warf added, so this sinding is in it will still need pilings, and I will need to build some skinny barges, and deck over them to make a floating dock that will go up and down with the waterlevel for the riverboat and barges.

a_8_6_14_river_boatr_a.jpg

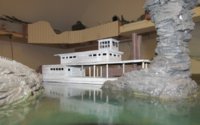
The Harlow Steam Navigation Company's Daisy passes Snag Island heading up stream.
 
Last edited:
  • Like
Reactions: gbwdude and zathros

Bill Nelson

Well-Known Member
Dec 14, 2008
2,680
467
78
Clarksville Tn
a_8_7_14_street_planninga.jpg
I have been real busy the last few weeks, getting ready to change jobs, and escape form the graveyard shift.

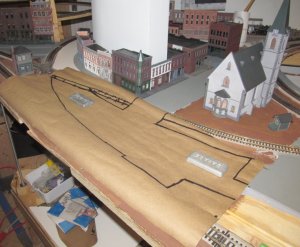
as a result I have not had much time to work on the alyout, but I have been working on Main Street toward th Northern end of Harlow. Firring the road in this area was tricky; as there are no straignt lines, and the road has to fit in close proximity ot the tailroad tracks.

I used brown packing paper laid out on the railroad, and then I traced the locarions of the base of roadbed, where the road followed the roadbed closely, and the location of the edge of the road in others. since then I traced the shape on foam core, painted both sides of the foam core to prevent warping, and glued it down with white glue, weighing it down to be sure it would staf flat. I will add sidewalks in places, using dense foam sheets cut to shape and with expansion cracks embossed into them. the joints in the foam core roads, the cracks near future grade crossings, and certain of the rough edges are filled in with acrylic spackling compound.
a_8_7_14_street_planning_b.jpg
 
  • Like
Reactions: zathros

Bill Nelson

Well-Known Member
Dec 14, 2008
2,680
467
78
Clarksville Tn
a_08_09_14_street_a.jpg
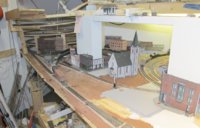
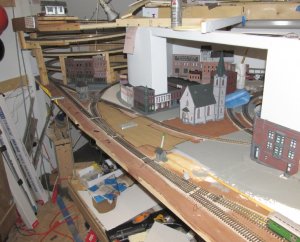
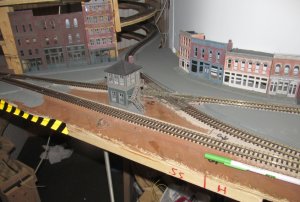
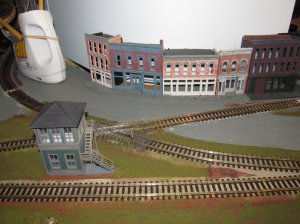
The streets are starting to shape up in South Harlow. I probably need to come op with some non directional desceiptions , as directional ones will be confusing. the tracks to the left of the tower, are the Southern's east and westbound main; coming together to make the Harlow return loop, which will allow Souther trains to come and go in both directions. On my old layout the Southern Just pushed cuts of cars on the layout. this will be much more operationally interesting. To add to the confusion, the view block sepaerates the tracks on my RR going South east toward the Iron Mountain ( on the front side of the center peninsula, and the tracks going northwest on the back side of the peninsula. sceinicly these areas are adjacent where the veiw block is open to allow the Southern Main to pass through to close it's return loop. So important landmarks in that opening, like the church, are simultainiously in South and North Harlow.


To the left is Mississippi Avenue, which crosses both Southern tracks, and then my Southbound main to T into main street, which runs the full lenth of the center penisula, except a portion behind the passenger station, which will be painted on the backdrop. Left Center, between the block of comercial buildings and St. Christoper's, is Texas Avenue. Directly in front of the church is a tiny stub of Ohio Avenue; and Georgia Avenue is Just to the right of the church.
a_08_09_14_street_b.jpg

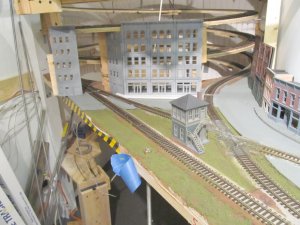
I will probably repace the flats on the far lect along he helix. I'm considering getting three City Classics Ohio Streeet buildings to bash together to front Mississippi avenue. the back and side walls could then be used to flesh out the impression of brick canyons around the Helix.

I'm not going for a full view block, I want to be able to see the trains on the helix if I want to, and ignore them if I want to, so the view block will be a soft one, diguising the brutal utility of the helix up and down, while still allowing operators to track trains in the helix nook as needed.

I need to start working on sidewalks and ground cover in this area. how soon that happens is up in the air. I'm wanting to do more electrical work to het the track toward the Southern staging at least partially operable, as well as wiring up the helix block. Alos on the lower level I am starting to work on scenery that would allow be to get a big bridge into place (I like building scenery under a bridge before the bridge goes in, that weay I don't mess up the bridge in the scenery construction process). Once that brodge is in place I can build the track for Sander's Switch on the long east wall of the lower deck. it will have a long passing siding and a long stub end siding; which will serve as a staging area on the lower deck, between those three tracks, and the long passing siding at murray, I could stage four trains north of Crooked Creek , permitting some real operational oportunities.


Nelson
 

Bill Nelson

Well-Known Member
Dec 14, 2008
2,680
467
78
Clarksville Tn
a_grass_at_eastt_ower.jpg

I have started to do ground cover, which makes the roads stand out much petter. I w3ill draw expansion cracks on the concrete roads later with a fine pint black pen. the next thing to do would be to do some ballasting, but I really should be wiring up the beginning of the southern staging, and the helix. starting work on the southern staging proper would be nice, as it would present lots of operating possibilities.

Nelsdon


a_east_tower_grass_b.jpg
 
  • Like
Reactions: zathros

Bill Nelson

Well-Known Member
Dec 14, 2008
2,680
467
78
Clarksville Tn
a_helix_facade_a1a.jpg


I'm working on the facade for the buildings on Mississippi avenue. My goal here is to make a soft scenic break. I want operators to be able to keep track of their trains in the helix. At the same time, I don't want the helix to totally overpower the casual viewer's impression of SE Harlow. this helix makes this track plan possible, I want to be able to see it for operations, but I want this narrow corner of the layout to look as good as possible.


Nelson
 
  • Like
Reactions: zathros

gbwdude

General Manager, W.R.Ry.
Jun 14, 2010
377
31
33
Omro, WI
www.facebook.com
Holy cow, that's a major change from the last time I was there! It does look very well done. Like it has been for the last couple years now, the Whiskey River Railway has had a lot of progress on it's rolling stock but zilch as far as anything to operate on. Since I'll be leaving the Army here soon, I hope to have a career that doesn't bounce me around to various corners of the world so I can have a place to build the WRRy.
 

Bill Nelson

Well-Known Member
Dec 14, 2008
2,680
467
78
Clarksville Tn
Thanks,


It is a big change, and should be much more operable with a nominal 3.3% ruling grade on the main. I will exceed that some on a short logging branch to the reload off the narrow gauge. my main line run will be more than twice as long, and the narrow gauge main line will be about three times as long. I had though originally that this would allow me to run signfficantly longer trains; but that is less likely. I will be able to run rod locomotives all the way up to State Line, and the dual gauge.

I was thinking about longer trains, but reality set in. none of my yards are longer. Even though Harlow is three times larger, and finally has some usable passing sidings; the Southern trains will come and go, so much of that siding capacity will be needed to accomodate the Southern Trains.


The rebuild of my RR has me working on my home RR much more; as my old RR was at a point where it needed maintenance more than construction, and thats not as fun. the last month or so getting ready to switch jobs, switching jobs, adapting to 1st shift life, and dealing with a diabetic dog, as well as the end of the summer farm work, shifting from mowing toward gettting ready for the firewood season has taken a lot of time.


In the last several weeks I have mainly been working on the Union Station for the club. Dr Tom is going to come over tommorow to help me cement plans for the upper deck, maybee that will get me moving on my rebuild. but I'm about one year and one month past the removal of the Gizzard section; and I think I have made marvelous progress, especially considering the tedious nature of the work done in the helix nook.

Good luck in finding a place for the Whiskey River. build carefully in sections. Croocked Creek is built carefully in sections. the more time you spend planning for a possible move the more likely you won't have to do it.


Nelson
 
  • Like
Reactions: zathros