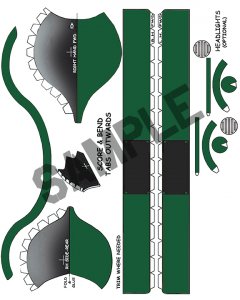
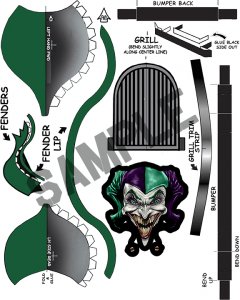
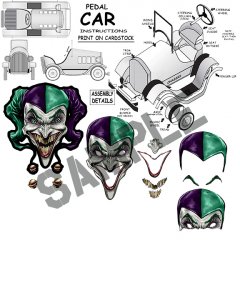
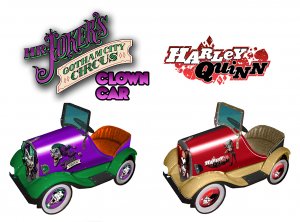
I was working on a new project for myself and decided to create a little tutorial. I'm working on a recolor of Fiddler's Green Pedal Car into the Joker's Clown Car for the Joker's Gotham City Circus. I opened the first page and created a layer to repaint the light tan color into purple. I'm using layers in case I want to do another recolor of the same Pedal Car with different colors later. Photoshop has an FX filter set that will let me recolor the layers to any color with a couple of clicks. You can do the same thing without layers by using the paint brush or the fill set to "color" fill, "darken", "lighten, etc.
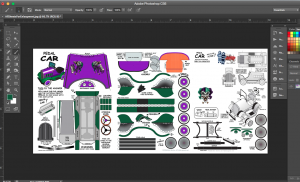
This is the starting image of the original Pedal Car page 01. Notice in the tool bar at left I already chosen my "purple" and "green" colors. In the "Layers" pallet at right I have created my first layer and named it "Recolor Purple".
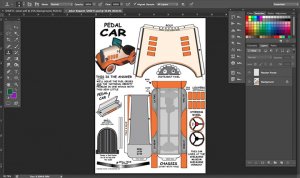
Image 02 I have set the layer to "Darken" and have started painting in the purple over the original tan color. You will notice that painting over the darker black lines with purple doesn't effect the black because the brush is set to "darken" only. I am using a brush but you can use any of the selection tools in Photoshop and just use the "fill". Since the "layer" is set to "Darken" the brush or fill can be set to "normal". If you are working on the original image or "background" you can work without layers and just paint or fill using the brush set to "darken" or use "Edit-fill-mode-darken". Either way will work.
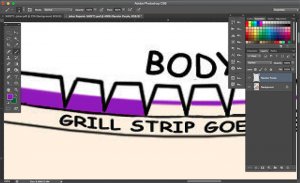
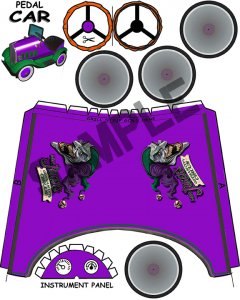
Image 03 I have finished painting the hood purple.
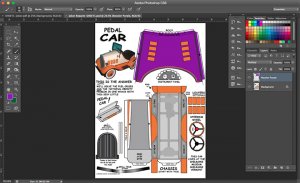
Image 04 I decided to paint the dash and the center of the steering wheel purple. Since the dash was gray I could set the layer fill to "overlay" and recolor it, but the "red" in the steering wheel wouldn't fill right so I set that layer to "normal". I could have converted the whole page to "grayscale" under mode and then converted it back to "rgb". Gray images are easier to recolor but some times harder to keep up with what needs to be colored since the whole page is shades of gray.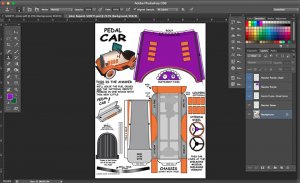
Image 05 and its time to repaint the "orange" to "forest green". I had the same problem that I faced with the "red" steering wheel center where it wouldn't recolor correctly with the layer fill so I set it to "normal" again and when I painted the green it covered the orange completely. That finishes page 01 of parts for now. I'll be coming back to it later to add Joker logos to the hood and overing up the green louvers on each side.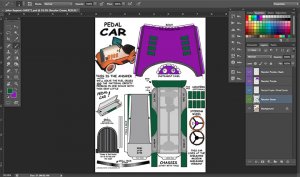
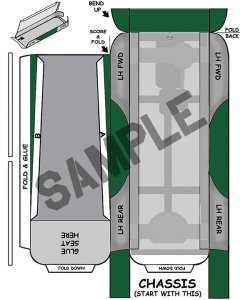
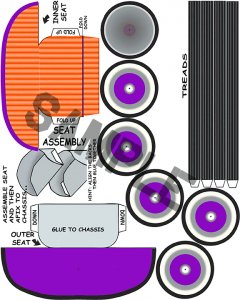
Image 06 I've moved on to page 02 of parts and recolored the green and purple as I did for page 01. On this page I wanted to use another Joker color and recolored the seat to "orange". This layer was set to "color". So we have now used three different layer fill modes, "darken", "normal", and "color". There are a lot of other settings that you can try. Each has a different use. This completes the "recolor" of pages 01 and 02.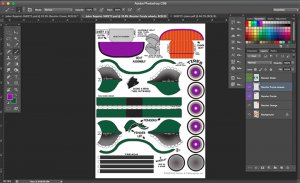
Image 07 I have gone back to page 01 and added two layers for each side of the hood for the Joker's Gotham City Circus logos. You create a new layer and paste in the logo. Select the layer and go to "edit-transform-scale". You can also go to "edit-transform-rotate". Since all we have done has been using layers you can move anything individually.
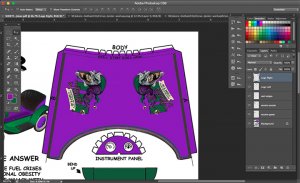
Image 08 I wanted the logos to show up a little more so I clicked on the logo to select it and then clicked the "fx" button at the bottom of the layers pallet. I then chose "drop shadow" and changed the settings until I liked them. After it looked the way I wanted it, click "OK" and the "fx" window will close. You will see an "fx" appear to the right of the name of your layer telling you that a custom filter set has been applied. I next held down the "alt" key PC or the "option" key MAC clicked on the "fx" on the first logo layer and drag a copy of it onto the second logo layer. That copies the custom filter set to the second logo. Double click on the "fx" on that layer to open the "fx" window, click on "drop shadow" and find the box that is checked for "use global light" and uncheck it. That will make your drop shadows go in the direction it should on each side of the hood since they are on opposite sides. I also made an extra "cover up" layer under the logos and added to purple boxes to cover up the "green louvers" on each side since I didn't need them from the original design.
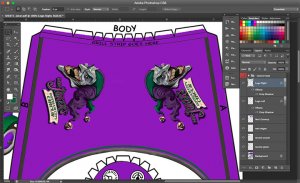
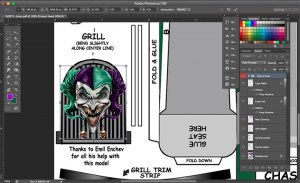
Image 09 I also made a front facing Joker Jester to match the side views used on each side of the hood. This one has been sized to fit over the grille. I cut the image apart and made several layers so I could "layer" the face up by gluing it one piece over another to make a fake 3D grille. The original model is too small for that but I will be enlarging the model after I build the first test build. I will post my build photos next week.
This is my first attempt at a tutorial for Photoshop so if theres something you don't understand feel free to ask questions and I'll try my best to explain any steps you might need.
This is the starting image of the original Pedal Car page 01. Notice in the tool bar at left I already chosen my "purple" and "green" colors. In the "Layers" pallet at right I have created my first layer and named it "Recolor Purple".

Image 02 I have set the layer to "Darken" and have started painting in the purple over the original tan color. You will notice that painting over the darker black lines with purple doesn't effect the black because the brush is set to "darken" only. I am using a brush but you can use any of the selection tools in Photoshop and just use the "fill". Since the "layer" is set to "Darken" the brush or fill can be set to "normal". If you are working on the original image or "background" you can work without layers and just paint or fill using the brush set to "darken" or use "Edit-fill-mode-darken". Either way will work.

Image 03 I have finished painting the hood purple.

Image 04 I decided to paint the dash and the center of the steering wheel purple. Since the dash was gray I could set the layer fill to "overlay" and recolor it, but the "red" in the steering wheel wouldn't fill right so I set that layer to "normal". I could have converted the whole page to "grayscale" under mode and then converted it back to "rgb". Gray images are easier to recolor but some times harder to keep up with what needs to be colored since the whole page is shades of gray.

Image 05 and its time to repaint the "orange" to "forest green". I had the same problem that I faced with the "red" steering wheel center where it wouldn't recolor correctly with the layer fill so I set it to "normal" again and when I painted the green it covered the orange completely. That finishes page 01 of parts for now. I'll be coming back to it later to add Joker logos to the hood and overing up the green louvers on each side.

Image 06 I've moved on to page 02 of parts and recolored the green and purple as I did for page 01. On this page I wanted to use another Joker color and recolored the seat to "orange". This layer was set to "color". So we have now used three different layer fill modes, "darken", "normal", and "color". There are a lot of other settings that you can try. Each has a different use. This completes the "recolor" of pages 01 and 02.

Image 07 I have gone back to page 01 and added two layers for each side of the hood for the Joker's Gotham City Circus logos. You create a new layer and paste in the logo. Select the layer and go to "edit-transform-scale". You can also go to "edit-transform-rotate". Since all we have done has been using layers you can move anything individually.

Image 08 I wanted the logos to show up a little more so I clicked on the logo to select it and then clicked the "fx" button at the bottom of the layers pallet. I then chose "drop shadow" and changed the settings until I liked them. After it looked the way I wanted it, click "OK" and the "fx" window will close. You will see an "fx" appear to the right of the name of your layer telling you that a custom filter set has been applied. I next held down the "alt" key PC or the "option" key MAC clicked on the "fx" on the first logo layer and drag a copy of it onto the second logo layer. That copies the custom filter set to the second logo. Double click on the "fx" on that layer to open the "fx" window, click on "drop shadow" and find the box that is checked for "use global light" and uncheck it. That will make your drop shadows go in the direction it should on each side of the hood since they are on opposite sides. I also made an extra "cover up" layer under the logos and added to purple boxes to cover up the "green louvers" on each side since I didn't need them from the original design.

Image 09 I also made a front facing Joker Jester to match the side views used on each side of the hood. This one has been sized to fit over the grille. I cut the image apart and made several layers so I could "layer" the face up by gluing it one piece over another to make a fake 3D grille. The original model is too small for that but I will be enlarging the model after I build the first test build. I will post my build photos next week.

This is my first attempt at a tutorial for Photoshop so if theres something you don't understand feel free to ask questions and I'll try my best to explain any steps you might need.
Last edited:


