The UHU02 Colonial Viper appreciation thread

silveroxide

Senior Member
Aug 22, 2007
2,036
525
113
Fayetteville NC
silveroxides Viper

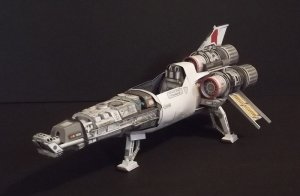
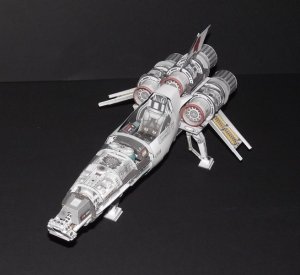
Great work on the landing skids. Keep up with the updates, since I keep track of what you guys are doing to help with mine.

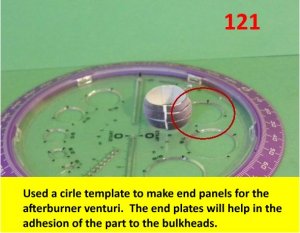
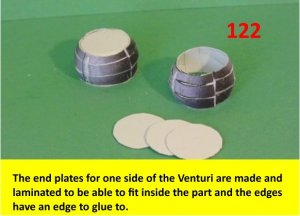
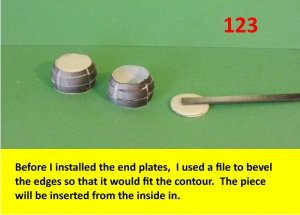
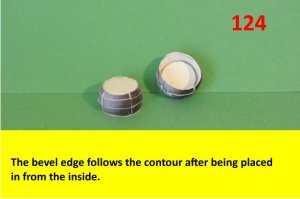
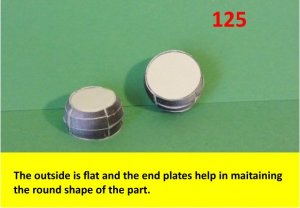
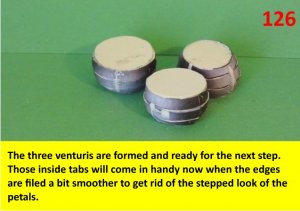
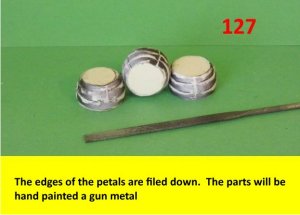
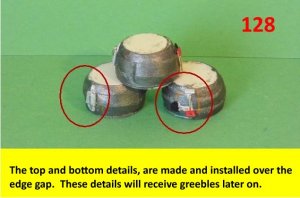
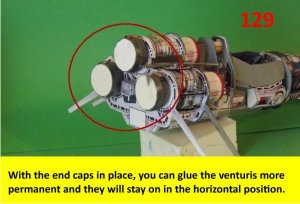
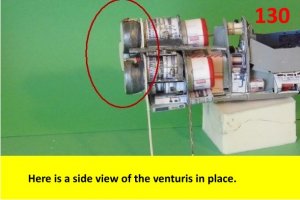
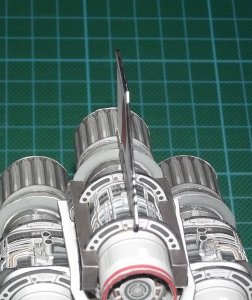
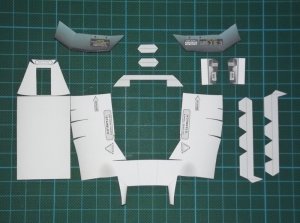
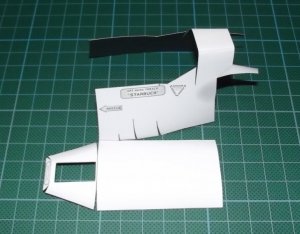
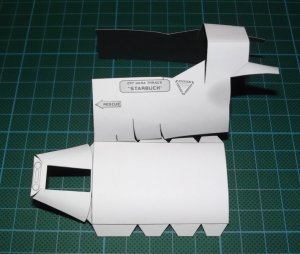
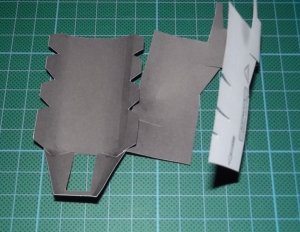
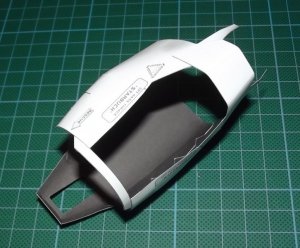
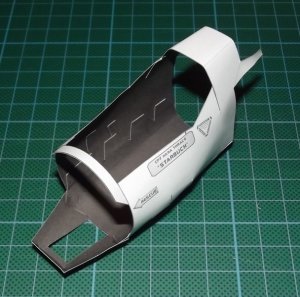
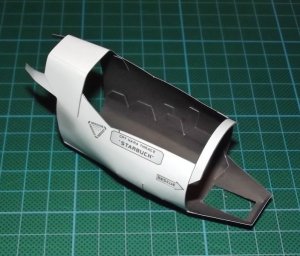
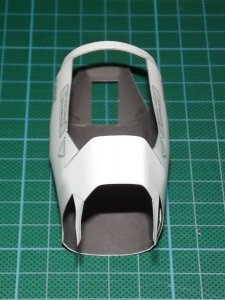
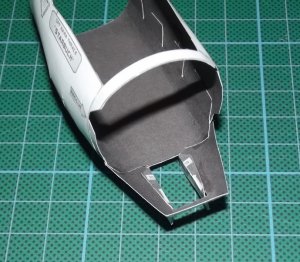
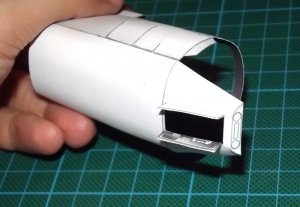
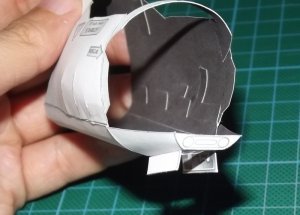
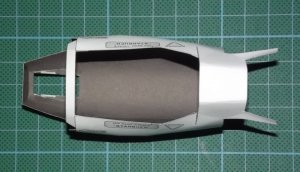
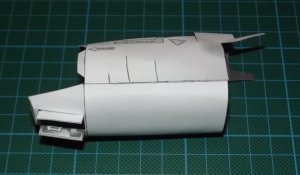
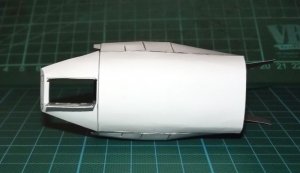
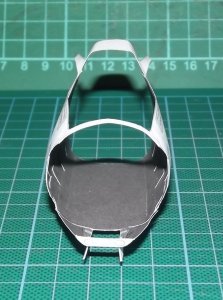
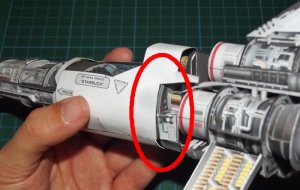
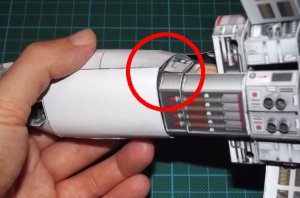
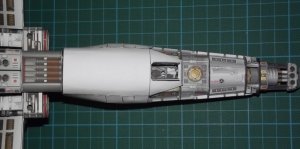
Here are some more photo updates on the after burner venturis. The end plates serve as a support, to maintain the shape and to serve as a flat surface to adhere to on the bulkhead. Enjoy and see you all next posting.:thumb:
 

Attachments

  • 121.jpg
    121.jpg
    51.2 KB · Views: 14
  • 122.jpg
    122.jpg
    45.3 KB · Views: 13
  • 123.jpg
    123.jpg
    42.4 KB · Views: 17
  • 124.jpg
    124.jpg
    30.3 KB · Views: 15
  • 125.jpg
    125.jpg
    34 KB · Views: 14
  • 126.jpg
    126.jpg
    50.4 KB · Views: 14
  • 127.jpg
    127.jpg
    37.2 KB · Views: 15
  • 128.jpg
    128.jpg
    46.9 KB · Views: 18
  • 129.jpg
    129.jpg
    56.8 KB · Views: 16
  • 130.jpg
    130.jpg
    42.7 KB · Views: 16

Rhaven Blaack

!!!THE MAN BEHIND THE CURTAIN!!!
Staff member
Administrator
Moderator
Jun 12, 2009
12,493
9,857
228
Oregon
www.deviantart.com
EXTRA components (Tool Box)

Here is the Tool Box (made by Revell-Fan) in 1:50 scale.
This will be going to be part of the diorama.

Here is the parts sheet.
IMAG2995.jpg

All of the parts.
IMAG2996.jpg

The main box.
IMAG2997.jpg

Main box is assembled.
IMAG2998.jpg

IMAG2999.jpg

The wheels.
IMAG3000.jpg

Wheels attached.
IMAG3002.jpg

IMAG3003.jpg

The box next to the Viper
IMAG3004.jpg

IMAG3005.jpg
 
  • Like
Reactions: cylongirl

uhu02

Banned
Oct 27, 2007
160
211
33
niigata Japan
Hello Rhaven Blaack,silveroxide,DanBKing,Revell-Fan and all.

Thing to see the building of you guys is my pleasure.:EEK:
Beyond my work, they are much masterpiece.:親指:

You give me the idea and the concept of new creation.
Thank you sincerely.

uhu02:波:
 
  • Like
Reactions: Revell-Fan

Rhaven Blaack

!!!THE MAN BEHIND THE CURTAIN!!!
Staff member
Administrator
Moderator
Jun 12, 2009
12,493
9,857
228
Oregon
www.deviantart.com
@UHU02: Thank you for your kind words and compliments. Such coming from you means a GREAT deal to all of us.
I am glad to see that you are enjoying this thread.
It is also an HONOR that we were able to inspire you through our collective work.
I am looking forward to see what you are going to create next.

Thank you once again for sharing your WONDERFUL work with all of us and giving us the opportunity to enjoy what all you have created.
 

Revell-Fan

Co-Administrator
Staff member
Administrator
Moderator
Aug 1, 2009
11,595
12,338
228
Vreden
Dear UHU02,

I couldn't have said it better than Rhaven. The fact that you are enjoying this thread fills me with great pleasure. Your design is very straight-forward, logical and intelligent. It is such a joy to build the plane. We still have some surprises left for our huge audience and I am sure the results will be spectacular.

Kind regards from Germany! :wave:
 

zathros

*****SENIOR ADMINISTRATOR*****
Staff member
Administrator
Moderator
Apr 5, 2013
13,499
9,551
228
You guys are so lucky! :)
 

Rhaven Blaack

!!!THE MAN BEHIND THE CURTAIN!!!
Staff member
Administrator
Moderator
Jun 12, 2009
12,493
9,857
228
Oregon
www.deviantart.com
Knuckle Dragger

I used Tirick's X-Wing Pilot for the Knuckle Dragger (THANK YOU TIRICK!!!).
The only problem, is that i printed it out a little too small for the diorama. The figure came out to be about 3.4cm (which after doing the math, would make it 5' 5" in real life). Then again having a short mechanic is not a bad thing.
I will have to increase the size by 5% (at the most, to get the height that I want).

Finished figurine.
IMAG3006.jpg

Figurine next to the Viper.
IMAG3007.jpg

Close-up of the Figurine (next to the Viper).
IMAG3009.jpg

ENJOY!!!
 

Revell-Fan

Co-Administrator
Staff member
Administrator
Moderator
Aug 1, 2009
11,595
12,338
228
Vreden
Call it "Cally" and there is no size problem any longer! :thumb:
 

Revell-Fan

Co-Administrator
Staff member
Administrator
Moderator
Aug 1, 2009
11,595
12,338
228
Vreden
Well, Starbuck too had a moustache once:

battlestar_galactica.3x18-300x169.jpeg

Source: http://persephonemagazine.com/wp-content/uploads/2012/07/battlestar_galactica.3x18-300x169.jpeg

sign1sign1sign1
 

Revell-Fan

Co-Administrator
Staff member
Administrator
Moderator
Aug 1, 2009
11,595
12,338
228
Vreden
+++ German sitrep +++

Let's hear some news from the German garage. :thumb:

First of all I want to show you some close-ups of the attached fin. After assembly you will have to paint the edges to make them look better. However, instead of painting the edges completely black you should let the tecture "bleed into" the edge, so-to-speak. To achieve that I coloured only the areas embraced by a black texture. In the end it looks as if there are some components wrapping around the edge which gives a very interesting result. The part looks stronger.
 

Attachments

  • DSCF2724.JPG
    DSCF2724.JPG
    147.3 KB · Views: 12
  • DSCF2725.JPG
    DSCF2725.JPG
    136.3 KB · Views: 10
  • DSCF2726.JPG
    DSCF2726.JPG
    111.2 KB · Views: 9

Revell-Fan

Co-Administrator
Staff member
Administrator
Moderator
Aug 1, 2009
11,595
12,338
228
Vreden
And now it's getting interesting again: The cockpit tub skin is coming.

All parts have been assembled according to the original instructions. I made some glue tabs from scrap pieces (of one of the pages with the printed back). They were used to connect the slits at the sides from the inside in order to get a smooth surface.
 

Attachments

  • DSCF2704.JPG
    DSCF2704.JPG
    139.4 KB · Views: 12
  • DSCF2705.JPG
    DSCF2705.JPG
    122.2 KB · Views: 11
  • DSCF2708.JPG
    DSCF2708.JPG
    113.1 KB · Views: 10
  • DSCF2709.JPG
    DSCF2709.JPG
    141.4 KB · Views: 9
  • DSCF2710.JPG
    DSCF2710.JPG
    134.4 KB · Views: 11
  • DSCF2711.JPG
    DSCF2711.JPG
    127 KB · Views: 13
  • DSCF2712.JPG
    DSCF2712.JPG
    125.2 KB · Views: 12
  • DSCF2714.JPG
    DSCF2714.JPG
    145 KB · Views: 13
  • DSCF2716.JPG
    DSCF2716.JPG
    94 KB · Views: 13

Revell-Fan

Co-Administrator
Staff member
Administrator
Moderator
Aug 1, 2009
11,595
12,338
228
Vreden
Be very careful when you are pre-shaping the parts. I rolled the part over a rod and a pen several times to get the correct shape. The following pictures give you an idea of the final look of the curvatures.
 

Attachments

  • DSCF2717.JPG
    DSCF2717.JPG
    162.9 KB · Views: 14
  • DSCF2718.JPG
    DSCF2718.JPG
    106.3 KB · Views: 13
  • DSCF2719.JPG
    DSCF2719.JPG
    107 KB · Views: 14
  • DSCF2728.JPG
    DSCF2728.JPG
    126.6 KB · Views: 11
  • DSCF2729.JPG
    DSCF2729.JPG
    97.5 KB · Views: 13
  • DSCF2730.JPG
    DSCF2730.JPG
    88.4 KB · Views: 13
  • DSCF2732.JPG
    DSCF2732.JPG
    102.2 KB · Views: 12
  • DSCF2733.JPG
    DSCF2733.JPG
    94 KB · Views: 15

Revell-Fan

Co-Administrator
Staff member
Administrator
Moderator
Aug 1, 2009
11,595
12,338
228
Vreden
And now the mounting: Turn the skin about 90° and put it over the nose. When it reaches the back of the seat turn it up. Take special care of the "hoses" on top of the head rest, they prevent the part from rotating freely. You have to manually lift one of the flaps over the head rest while rotating the skin. Then it is CAREFULLY pushed over the cockpit area. You might encounter some problems at the back of the cockpit tub because the skin may be a bit tight there. I have marked the areas in question in the pics. It is: the former at the back of the cockpit, the small boxes behind it and the missile box at the bottom.

Do not force anything.

If you feel any resistance take the skin off again and press the troubling parts on the fuselage in place gently. Then try again and pull the skin over the areas by using a pair of tweezers and by applying some pressure to the skin with your fingers from the inside of the cockpit tub (see red arrow). Do not press, push and pull too hard in order not to break anything.

Once the part is in place you may press it gently to shape.
 

Attachments

  • DSCF2735.JPG
    DSCF2735.JPG
    109 KB · Views: 13
  • DSCF2737.JPG
    DSCF2737.JPG
    146.7 KB · Views: 14
  • DSCF2739.JPG
    DSCF2739.JPG
    105.7 KB · Views: 14
  • DSCF2740.JPG
    DSCF2740.JPG
    135.1 KB · Views: 14
  • DSCF2741.JPG
    DSCF2741.JPG
    125.5 KB · Views: 14
  • DSCF2743.JPG
    DSCF2743.JPG
    108.4 KB · Views: 14
  • DSCF2745.JPG
    DSCF2745.JPG
    104.1 KB · Views: 14
  • DSCF2747.JPG
    DSCF2747.JPG
    110.9 KB · Views: 12
  • DSCF2748.JPG
    DSCF2748.JPG
    127.7 KB · Views: 13

Revell-Fan

Co-Administrator
Staff member
Administrator
Moderator
Aug 1, 2009
11,595
12,338
228
Vreden
The skin is in place - and can be removed again!

bounce7bounce7bounce7
 

Attachments

  • DSCF2750.JPG
    DSCF2750.JPG
    150.6 KB · Views: 15
  • DSCF2751.JPG
    DSCF2751.JPG
    123.7 KB · Views: 16
  • DSCF2752.JPG
    DSCF2752.JPG
    116.8 KB · Views: 13
  • DSCF2753.JPG
    DSCF2753.JPG
    107.6 KB · Views: 11
  • DSCF2754.JPG
    DSCF2754.JPG
    85.3 KB · Views: 12
  • DSCF2755.JPG
    DSCF2755.JPG
    91.4 KB · Views: 11
  • DSCF2757.JPG
    DSCF2757.JPG
    104.1 KB · Views: 12
  • DSCF2763.JPG
    DSCF2763.JPG
    102.3 KB · Views: 16

Revell-Fan

Co-Administrator
Staff member
Administrator
Moderator
Aug 1, 2009
11,595
12,338
228
Vreden
--- Breaking News ---

I have assembled the nose skin - and it doesn't fit! It is too tight and can't be pushed over former 8 as intended. As a result, there is a 4 mm gap between cockpit tub skin and nose skin which has to be closed. CU later with some pics and a possible solution. Stay tuned!
 

Rogerio Silva

Active Member
Nov 9, 2012
1,520
11
38
56
Rio de Janeiro - BRAZIL !!!
running nose...

I have assembled the nose skin - and it doesn't fit! It is too tight and can't be pushed over former 8 as intended. As a result, there is a 4 mm gap between cockpit tub skin and nose skin which has to be closed. CU later with some pics and a possible solution. Stay tuned!

RF

Do you think you can re-print the page with a small upscaling, in order to make it fit? :confused:
 

Revell-Fan

Co-Administrator
Staff member
Administrator
Moderator
Aug 1, 2009
11,595
12,338
228
Vreden
Actually, I fear an upscaling would make the skin wobble back and forth and would make things worse; a difference of 4 mm is quite big in that scale. I intend to add a rim to the skin and to re-align the cutouts for the mechanics behind the guns and the cutouts for the bottom RCS thrusters.