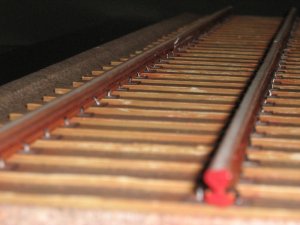
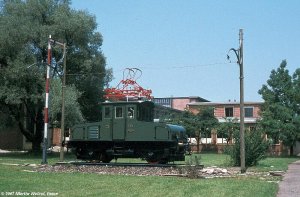
1/38 Rail bed and track

DanBKing

Dan the Man
Feb 29, 2012
1,817
1,587
113
Netherlands
In my earlier thread on the E94 Krokodil, I showed the build of the loco that I did for a friend.
But it hasn't ended there. THe next step is to make the railway track itself to place the model on! Then I am going to build a catenary to complete the display.

SO, here is the start of the build for the railway track.

I found the model at this Dutch website: http://www.schaalbouw.nl/index.html
The model comes in 1/45 scale, but I needed it to be 1/38 scale to fit the model loco. The distance between the centres of each wheel as measured across the axel is 43mm, so I scaled the print to make the distance across the rails the same.

I cut out the gravel bed from the sheet and attached it to some 8mm foamboard as a base. Two strips of thick card were glued along the sides of this to create a 'hump' along both sides of the track.
This baseplate will eventually be attached to a nice piece of hardwood for the display.

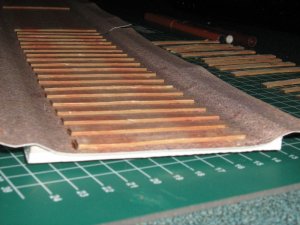
The sleepers were laminated to 2mm thick card and cut out.
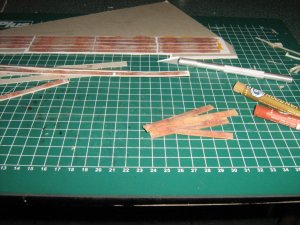
058.jpg

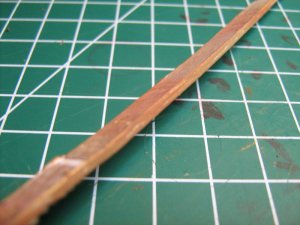
I coloured the edges of the sleepers with oil based pastels to match to wood and rust colour of the sleepers and blended it in with my fingers...
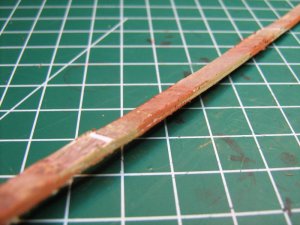
063.jpg
064.jpg

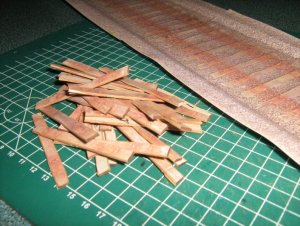
The 'woodpile' ready for mounting......
066.jpg

Sleepers going on......

006.jpg

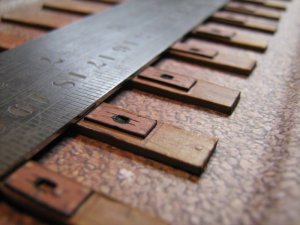
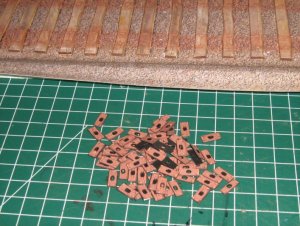
Then all the rail clamp plates were laminated to thicker card. The slots that make the clamps themselves were cut in the plates.
003.jpg
 
  • Like
Reactions: Tonino

DanBKing

Dan the Man
Feb 29, 2012
1,817
1,587
113
Netherlands
Next, the clamp plates were mounted to the sleepers. I triple checked all measurements and made sure everything was kept perfectly straight by using a steel rule as a guide.

010.jpg

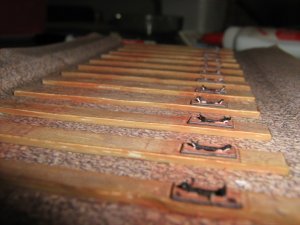
Once the glue had dried, I prised up the two tiny clamps on each plate, ready to accept the rail. Just need to touch up the white edges with some colour later.

015.jpg

Tommorrow, I should have the rails done, and will post more photos then.

:wave:
 
  • Like
Reactions: Tonino

DanBKing

Dan the Man
Feb 29, 2012
1,817
1,587
113
Netherlands
Well, I started on the rails, but it took me 3 attempts to get it right...

The tops of the rails are only about 3mm across and 1mm thick at this scale. This required some accurate scoring and folding. I used my new design lightbox/cutting table, placed the sheet print-side down on it so I can see through the 160gsm paper and score the back directly. It was just a case of lining up the rule on the fold lines showing through paper and scoring the line. Two of the fold lines are only 1/2mm apart and the two folds are a mountain fold AND a valley fold so close together!!!

Once I had everything scored, the folding began.... These are rails, they have to be straight in all elevations. So I tried different ways of folding until I found the most accurate way.
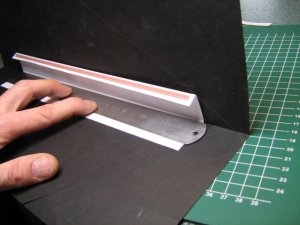
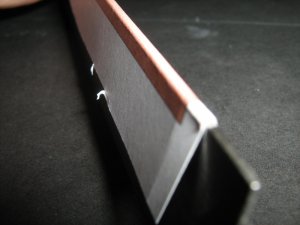
I scored a straight line across a sheet of 1mm card and in combination with a steel rule, used the card as a sort of brake press to fold the 30cm long rails. The picture might make it a bit clearer. The rule, and the fold line on the rail piece must line up accuratly with the fold line on the card, hold the rule down and lift the flap of the card up in gradual steps.

025.jpg

The folds for the edges of the rail were 'crisped up' over the edge of the steel rule.

031.jpg

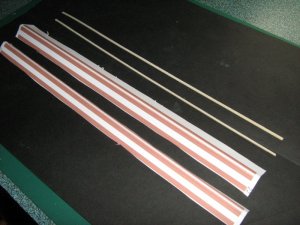
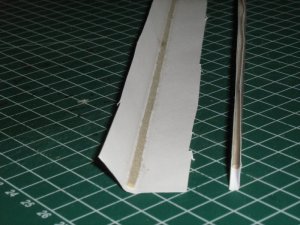
Once the rails were all folded correctly, I then cut two 2,5mm wide strips of 1mm card from a memo pad. These strips are glued inside the rail for rigidity.

032.jpg`
042.jpg

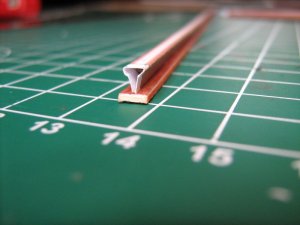
Once the strips had dried, I trimmed the rails to size. Then folded the rail over the glued in strips and formed a U shape (See pic above). Glue was applied all along the inside of the U shaped rail, and with careful finger movements, glued the top edge of the U together first to align it, then squashed the U shape together to form an upside down Y. Does that make any sense ???? LOL.
You can see the result in the picture below. Note that in the picture the rail is already attached to the base of the rail here. This was done by using the edge of my cutting mat, steel rule and other bits of card to make a gluing jig to hold the base of the rail straight and true while the rail was edge glued to it.

048.jpg

I should have everything complete later today and will post pics of the completed tracks later, but here is a pic of what the rail looks like when placed in position. I just need to bend and glue the clamps onto the rail base and touch up the colour here and there and we are done!

054.jpg

See you later with the final installment.

:wave:
 
  • Like
Reactions: Tonino
Z

Zathros

The rails came out great!! I lived next to rails like that for 23 years!, these look strikingly familiar, the base should be a little wider, in reality, they should be parallel to the bottom of the rail where they then flare out to the flat bottom. Most look like the attached picture. I have a 2 foot section, it takes a couple of us to move. I use it as an anvil of sorts! :)

1916-004-06th.jpg
 

DanBKing

Dan the Man
Feb 29, 2012
1,817
1,587
113
Netherlands
Eindelijk klaar!!!

I had to wait a bit with mounting the rails. I found that the foam board that I had used, was warped across its length. I went hunting for a suitable solid base to mount the rail bed on. I found a piece of finished shelf that was perfect for the length and width that I needed at the local hardware store.
Once the rail bed was glued to the wood base, everything was now perfectly flat.
With that achieved, I mounted the rails and set the clamps.

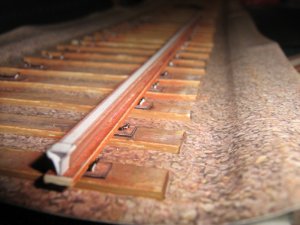
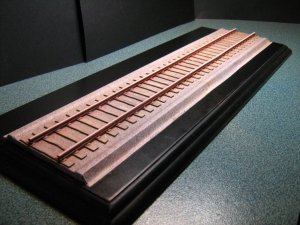
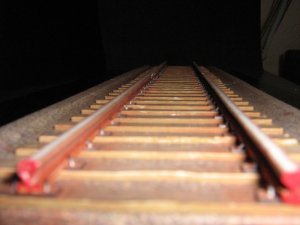
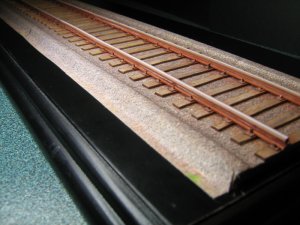
Here are the pics of the finished display base.

009.jpg

014.jpg

018.jpg

023.jpg

:wave:
 
  • Like
Reactions: Tonino

DanBKing

Dan the Man
Feb 29, 2012
1,817
1,587
113
Netherlands
I'm not impressed with myself for leaving all the 'white bits.'

But, there is still more to do on this whole project.. This is only stage 3 of 5...

Stage 4 is all about designing and creating a catenary to suit.....

Stage 5 is putting it all together to make it 1. And that includes all the final touch-ups. Most of the white bits you see in these pics, will be hidden by the loco itself, so I'm not gonna go too insane just yet....:p

:wave:
 
Z

Zathros

You could always take some clear flat paint and fill it with real rust powder. The resulting rust paste makes for an excellent touch up paint, which can be thinned to the viscosity needed. It looks great. In the picture it looks more like reflections! The catenary on the right model would be a neat way of powering on board LED's lights. :)
 

Chris74

New Member
Jun 3, 2010
113
15
8
Romania
There's also the method of weathering with a graphic pencil, for the white spots... the result would imitate the aspect of bare metal. If available, I guess some little grass stuff (Noch, Woodland) could be put near the track, here and there... optionally, of course (I mean, I'm not sure if would look better or not).
 

DanBKing

Dan the Man
Feb 29, 2012
1,817
1,587
113
Netherlands
As I said earlier, there is still plenty more to do on this project.
Adding bushes and grass is one thing stilll to do.
I want to get the loco mounted before doing any 'super detailing'.
 

rickity

New Member
Dec 26, 2010
11
0
1
This Side of Eternity
:thumb: Impressive, very impressive..............this will go excellent w/the E94.
Liked the part about using the heavy card as a break to fold the paper......I filed that away for future use:thumb:
RH:mrgreen: