Start of my Patoroch Imperial Guard army

mmorris0987

New Member
Jan 2, 2013
30
17
1
So here's the first start to my paper Imperial Guard army. I plan on all of my vehicles being paper from Patoroch's templates.

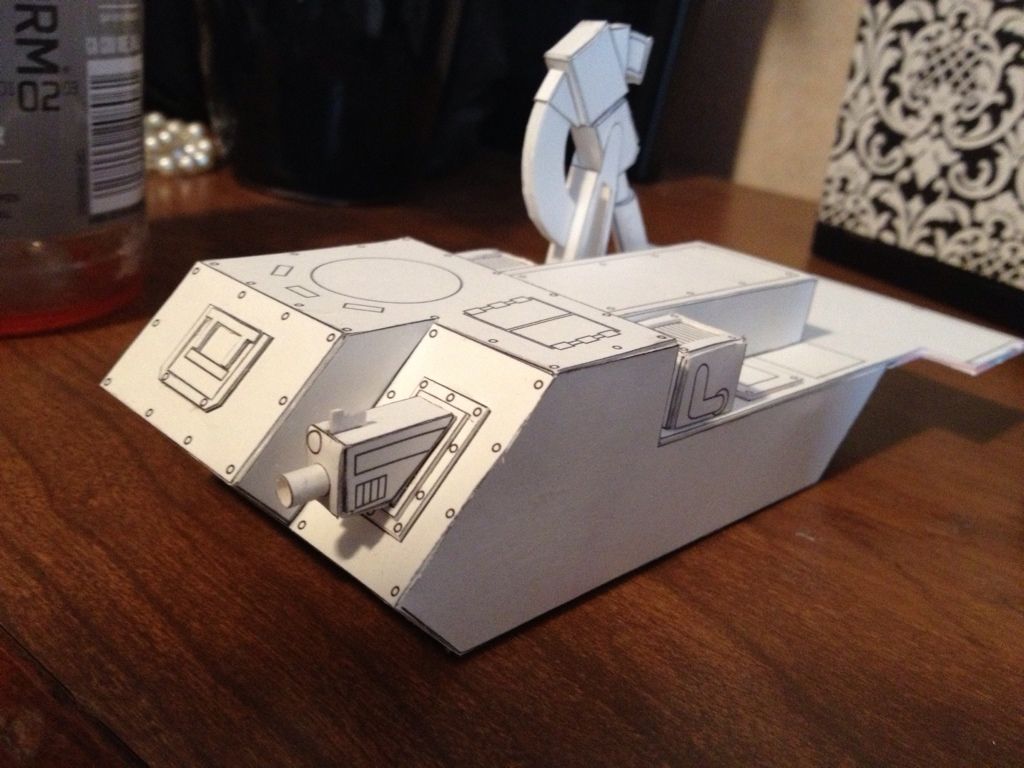
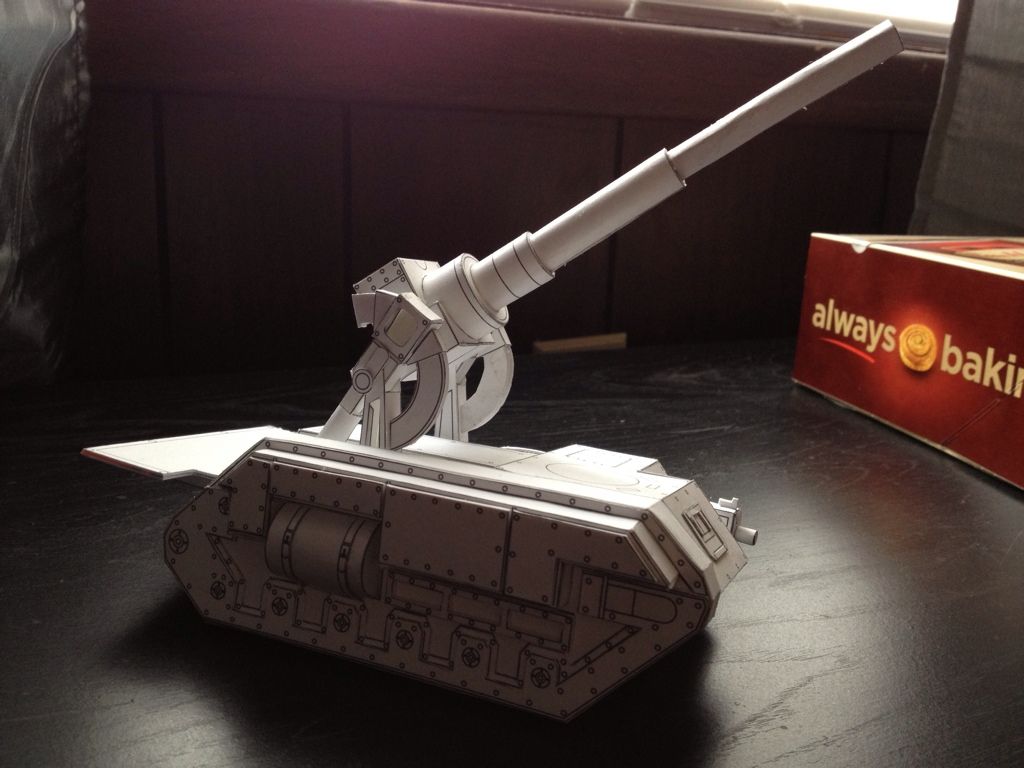
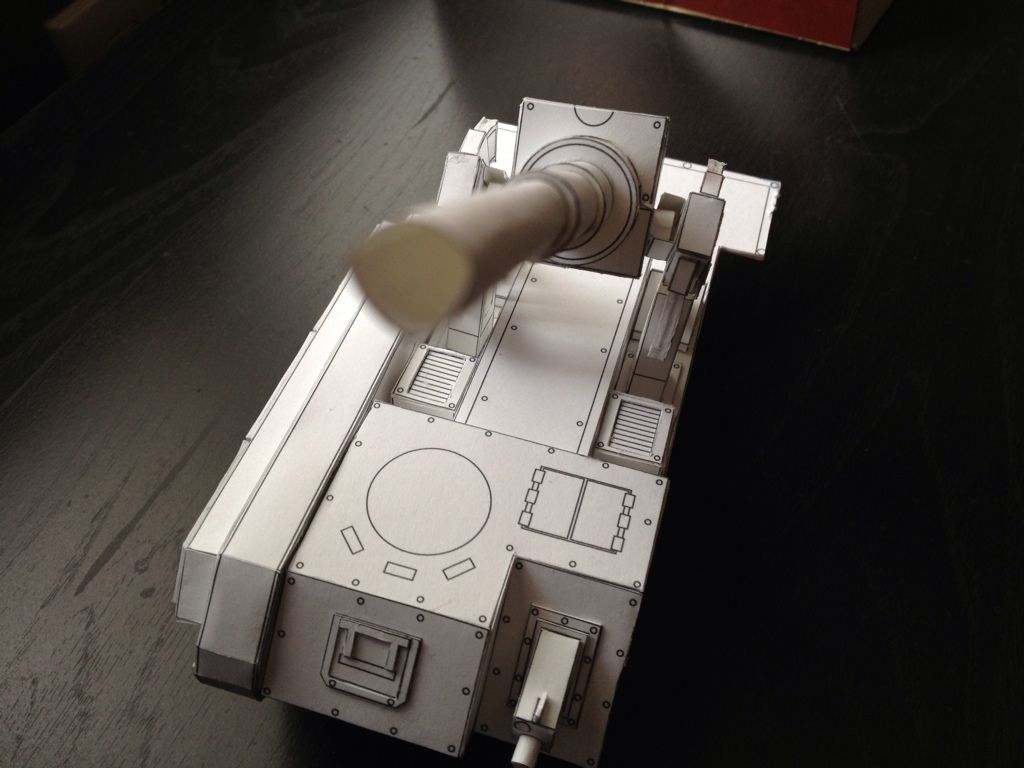
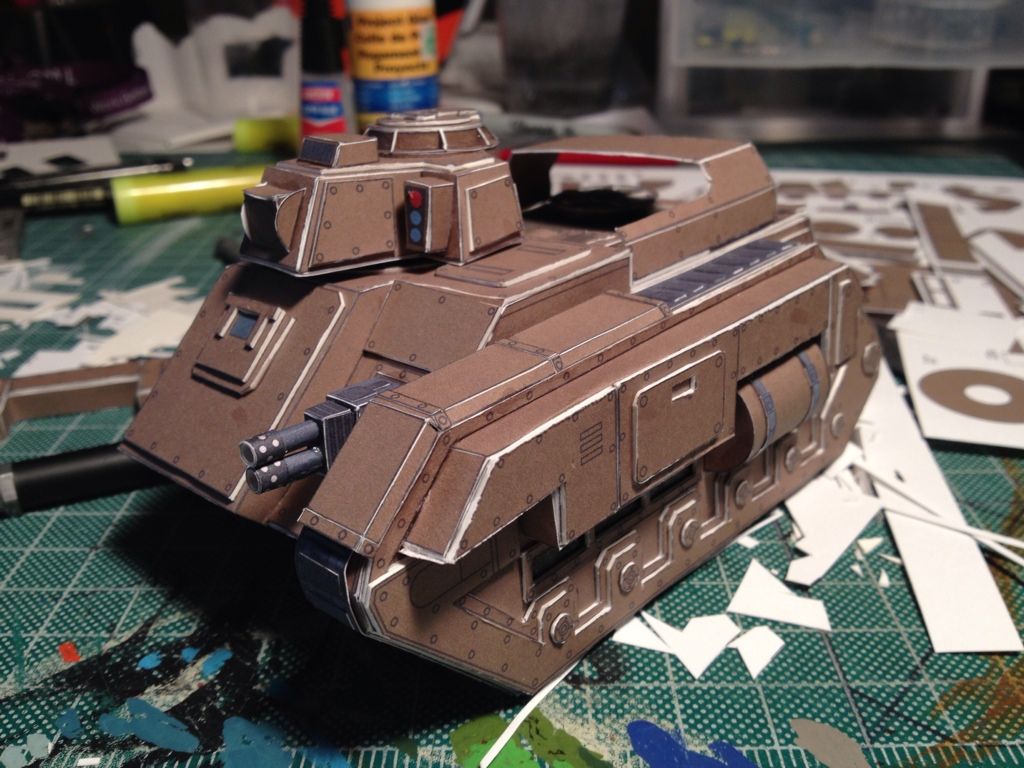
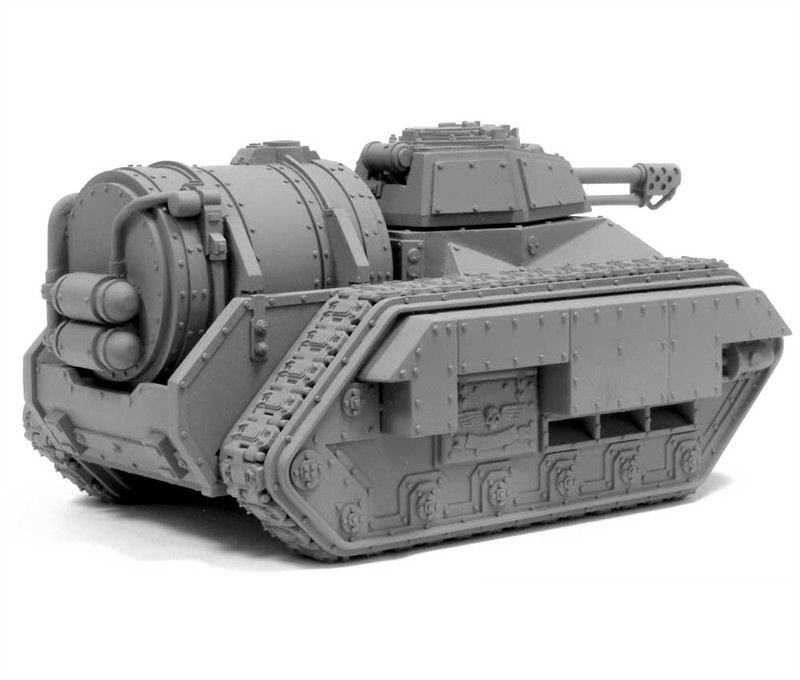
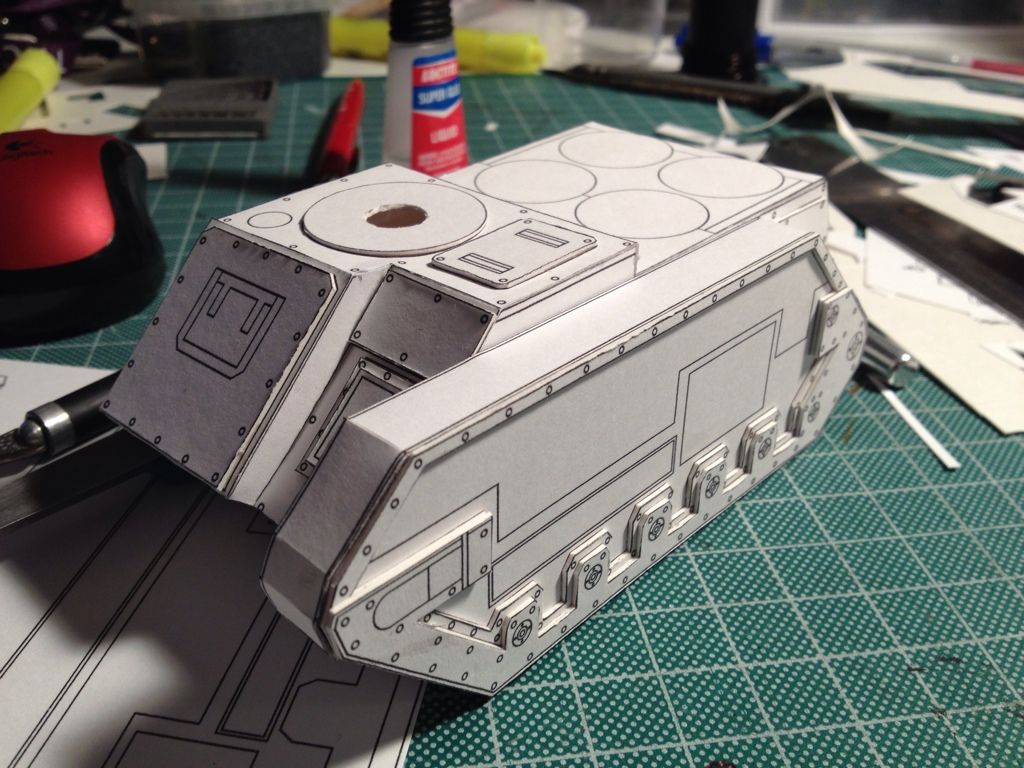
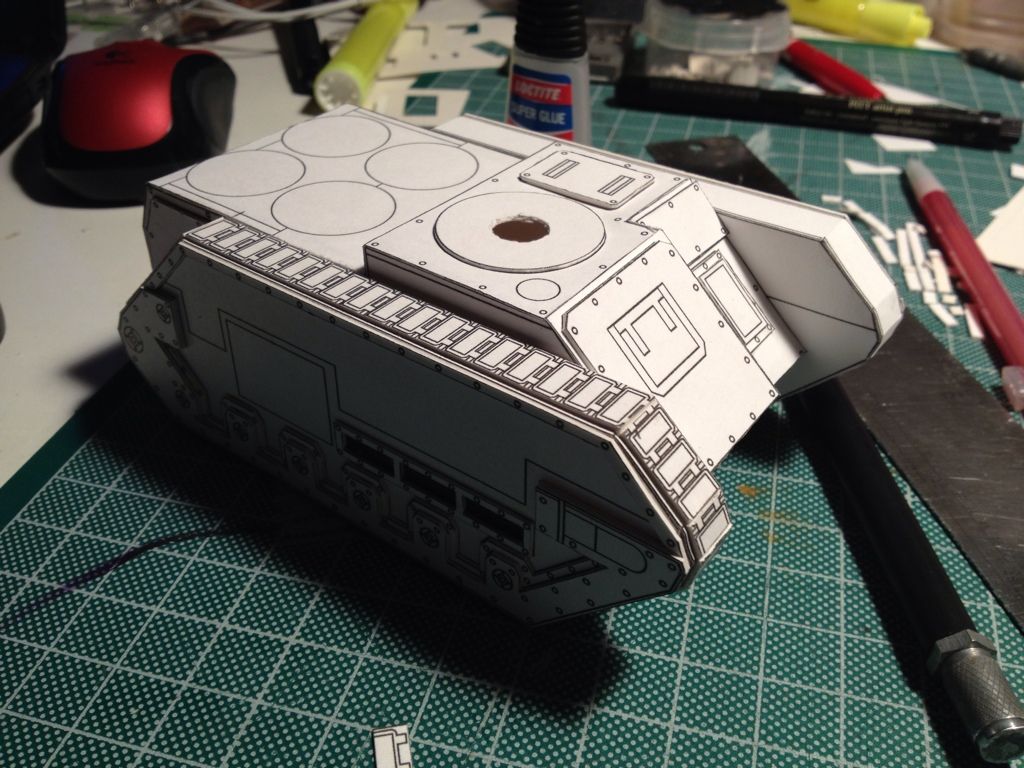
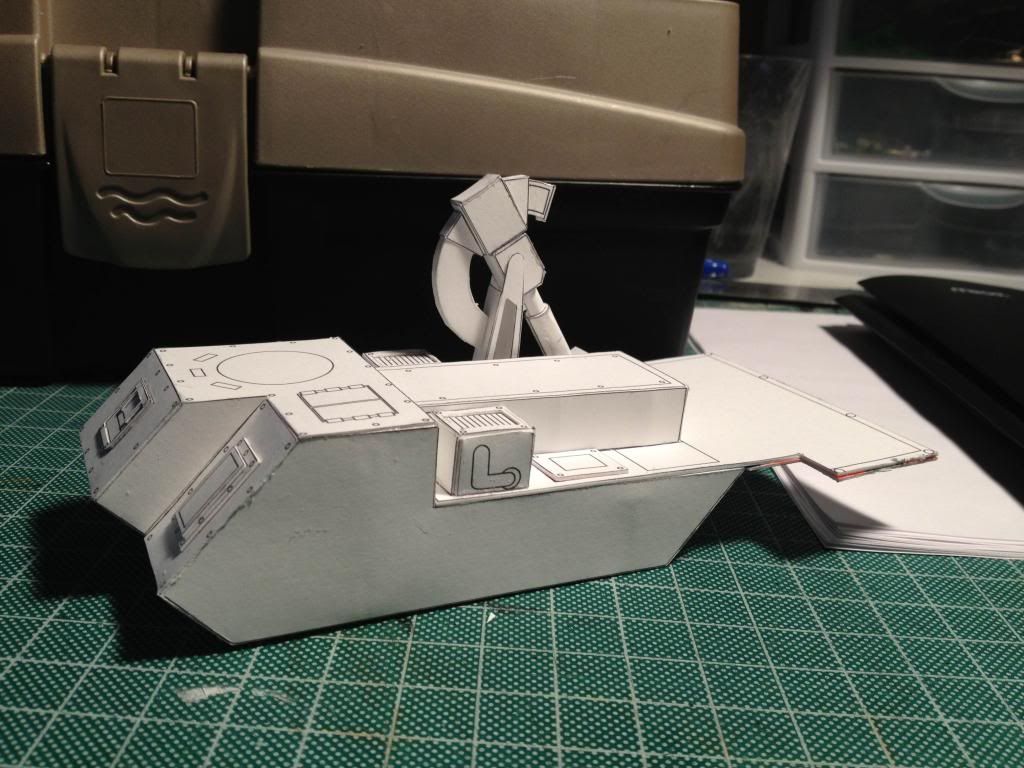
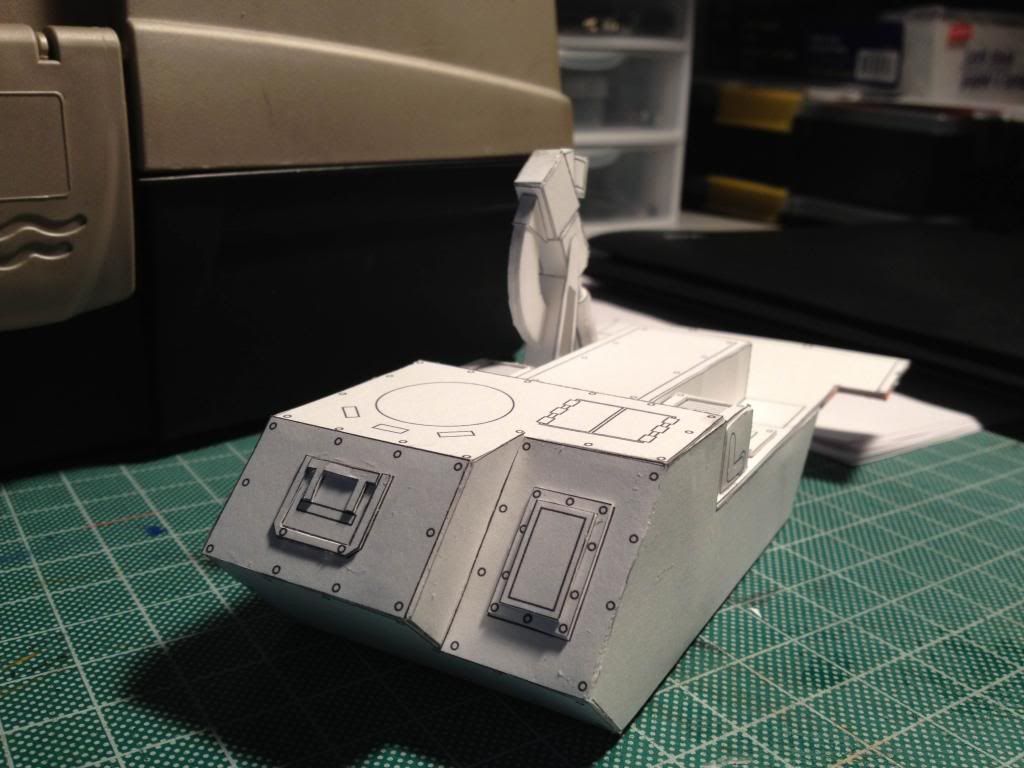
This first model is one that I've always wanted to build, a basilisk. I need to shuffle around some of the pieces before I print next time because the other bottom support for the hydraulic arm was cut off during printing, as well as a couple other detail pieces. 95% of this is 65lbs card stock, I used a for sale sign from Walmart as plasticard since it's pretty scarce where I live here in Ohio (keeps me from driving over an hour to get some). I only used it on the crew platform since that needed to be sturdy. I have 5mm foamcore supports inside the main body for help keep the structure rigid. I'm sure on my second and further builds I will create a more elaborate internal support system.

Let me know what you think! I'll keep posting progress as I build each model.

photo_zpse122678b.jpg


photo1_zps91328591.jpg
 

silveroxide

Senior Member
Aug 22, 2007
2,036
525
113
Fayetteville NC
I do not know if you made inside templates for the armored vehicles. I tend to glue the templates over heavier card stock or laminated card stock. Mine are sturdy enough for constant gaming use The inner strength will become a premiun later on if you wish to constantly handle your pieces. Eli's models are great builds on their own but they can be enhanced with more details and extra stuff like ammo cans, cases, canvas, netting or other stuff. If you started on the Warhammer binge, you are in for a long model building splurge. Continue to post your works, enjoy and see you around the forum.
 

mmorris0987

New Member
Jan 2, 2013
30
17
1
Thanks silver! I was going to pick up some 110lbs card stock when I refilled my printer ink and bought the 65lbs stock, but at $20 per 250 count, it's a bit pricey at the moment. luckily I have about emptied my Frosted Flakes so I'll have that thickness to laminate with on my second build. Basically with the foam core, I'm just using it as cross braces to keep the sides from collapsing while I glue the track modules to the main body. I've also been gluing together stock at 5 or 6 thick for the side details so they stick out some. I'm finding that I'm picking up the technique more and more as I go along, so half of this first model will be rough and the second half will be awesome lol.
 

silveroxide

Senior Member
Aug 22, 2007
2,036
525
113
Fayetteville NC
Used shoe boxes work real well. At the dollar stores, you can get those shirt boxes which are good material for inside supports. Your local stores, especially sears and macys through out large quantities of card stock as well, just ask and they may help you out. I usually say that I need it for school projects that I am conducting!!!! Anyways, it is still cheaper than buying sheet styrene.
 

mmorris0987

New Member
Jan 2, 2013
30
17
1
Anything is by far cheaper.

Just got the hull mounted heavy bolter attached. Ended up making a top sight for it since I didn't see one on the templates.

98EF94DB-A27D-422F-858B-ED882A2E2165-162-00000006AE2D436F.jpg
 

mmorris0987

New Member
Jan 2, 2013
30
17
1
I mainly work on my models during my work at Time Warner Cable. I work at a call center so there's tons of downtime. Last night I managed to get the main part of the cannon and most of the right track module finished and attached. I still have the actual track pieces and the top portion of the cannon to finish and attach, more than likely I'll be able to finish the cannon piece today before my shift. I'm aiming for completion on this bassi by Monday, I have a game vs Orks and want a pretty death machine in the back field. I'm holding off on putting any extra greebles until my second or third model, that way I can become adjusted to the way the media works and folds.

2011FB26-ABE9-4EED-A100-63D3085480BD-116-00000000B08175B6.jpg


25FCAC5A-9190-421A-ADF8-608A617B76AF-116-00000000ADD881BE.jpg


I'm having some trouble rolling the smaller tubes, I already use pens, file handles, drill bits, etc. to roll them around to start the form. Is there any other little tricks I can use to make it a bit easier?
 

Kjev

Active Member
Dec 15, 2006
344
52
31
South Eastern Idaho
My mom taught me a trick:

Take the paper and pull it over one edge of a pair of scissors. It will make the paper curl. She used to do this for ribbons on presents.
 

mmorris0987

New Member
Jan 2, 2013
30
17
1
Started a second vehicle tonight. Going to get them both to the same point then attach the other track module. This ones going to be a hellhound.

1F0D264A-C0B4-4FF2-ABB2-F947B086D3B1-325-0000001CE9862147.jpg
 

silveroxide

Senior Member
Aug 22, 2007
2,036
525
113
Fayetteville NC
If you are going to build the colored versions, be sure to color the edges of the parts, either with felt pens or acrylics. This will make the model stand out more. There are various other ways to accomplish this, but the two mentioned are the most common used. keep up the good works and waiting to see more.
 

mmorris0987

New Member
Jan 2, 2013
30
17
1
Luckily I think I have a Sharpie that is the same color olive as the hellhound. The basilisk is more of a practice build to see if I could actually do this, eventhough it's still not bad.
 

terrinecold

Member
Apr 15, 2012
303
1
16
you'll want to color the edge before gluing as much as possible as once it is glued it is hard to have a neat effect but before it is easy to color just the edge
 

mmorris0987

New Member
Jan 2, 2013
30
17
1
you'll want to color the edge before gluing as much as possible as once it is glued it is hard to have a neat effect but before it is easy to color just the edge

I'll probably end up doing the edge finishing on my third model then, and just use these first couple to "feel out" the hobby. This is definitely a replacement to spending $50 a vehicle through GW though. And the models are superb, especially if done like the thunderhawk thread I seen in this forum.
 

mmorris0987

New Member
Jan 2, 2013
30
17
1
More progress on the Hellhound. Have the entire left track module including the tracks attached, need to finish the fans up top, turret weapon, and right track module today. Have my 2000 point game against my buddy and his ork army tonight, have to look decent when I'm placing those templates :p

D1DE2C51-A666-43B7-B59C-0D2CE4F315CA-195-000000063FD03C09.jpg
 

mmorris0987

New Member
Jan 2, 2013
30
17
1
Once I completed most of the first hellhound, I realized that the fans on the rear top of the body were just an annoyance. I was looking through Forgeworld and found the Graia pattern Hellhound. I'm thinking of starting to work out a template for the tank to replace the fans but I'm unsure how to go about it. I used to have 3DStudio Max and Maya, but don't anymore. And needless to say, my 3D modeling skills have been more than deteriorated in the 5 years it's been since I've messed with either. Looks like I'm going to have to do it the old fashioned way. I probably won't modify the main chassis for the whole tank, but make more of a half tank. Once I can get that done, I may try a full tank. If any of you want to try and make one in one of the programs and make a template, please do :)

Graiapatternhellhoundforgeworld_zpsee270a58.jpg
 

mmorris0987

New Member
Jan 2, 2013
30
17
1
New blank build for the G Hellhound build. Taking my time with the cuts and placement for gluing so it comes out nice and clean. Going to paint it when I'm done.

83D417A8-BD51-4A49-8E8E-C17B216398C5-216-0000000E6147C7B6.jpg
 
Z

Zathros

Do you have any templates? Your work is incredible! It's a honor to watch come together:)


.
 

mmorris0987

New Member
Jan 2, 2013
30
17
1
Do you have any templates? Your work is incredible! It's a honor to watch come together:)


.

Thanks Zathros! But I don't have any of my own templates, I'm just using Patoroch's templates. Going to design the big tank for the back myself from the G Hellhound from Forgeworld. I like having the big fuel tank in the back instead of the fans.
 

mmorris0987

New Member
Jan 2, 2013
30
17
1
More progress on the new hellhound. Have both sides attached, half of the base tracks attached on one side. I'm probably going to finish the sides completely before I start on the big fuel tank for the rear deck.

2A8AC546-419F-4599-BA32-918D86E6E494-216-000001355AD65399.jpg


DCB27B5C-4242-43C4-BAAB-B299A0255034-216-000001355E2BA851.jpg