Northrop Flying Wings

Status
Not open for further replies.

Paragon

Active Member
Apr 22, 2007
814
48
38
37
Greenville NC, USA
www.freewebs.com
Alright, just figured I'd start a thread here for my next model, to help make sure I actually get started on it. I've decided to take a break from Star Trek models for a little bit and get back to aircraft. Not sure how long that will last.

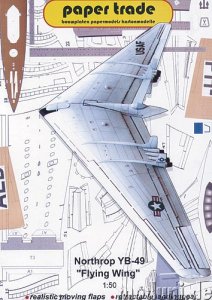
Anyway, this thread is for the next three very similar models I will design of Northrop flying wing aircraft, the N-9MB, YB-35, and YB-49. Hopefully, the many similarities in design will help me design the second two very quickly once the first is done.

I chose this subject because I am unaware of any models of them available yet, and figured there would be a decent bit of interest.

These models will probably be available from ecardmodels.com when finished. First up will probably be the N-9MB scale demonstration aircraft.
 
T

Texman

Paragon,

Are you planning landing gear? What scale? Details Man!

Ray
 

Paragon

Active Member
Apr 22, 2007
814
48
38
37
Greenville NC, USA
www.freewebs.com
Well I guess I have to do landing gear, don't I? Right now I'm shooting for 1/72 scale for the YB-35 and YB-49. I'm not exactly sure about the N-9M yet. It was a 1/3 scale prototype of the other two, so if I made it the same size as the two bombers, that would make it 1/24 scale, right? That would put the wingspan of each at about 2' 6"...

Thats a wider wingspan than anything else I've designed yet, the closest is my jumbo Catalina at 2' 1" (I just realized, I haven't shown anyone that yet, have I?). I ran into some major warping issues on the wings of that one, I think the only real way to solve that would be segmented wings...

On second thought, I think I'll go with 1/144 for the bombers and 1/48 for the prototype. I'll try to make them nice and detailed and offer high resolution, for anyone who wants to try scaling them up.
 
J

jagolden

On second thought, I think I'll go with 1/144 for the bombers and 1/48 for the prototype. I'll try to make them nice and detailed and offer high resolution, for anyone who wants to try scaling them up.

Paragon, please, in vector format if at all possible, for clean enlargements.
 
Paragon,
You are amazing! Any chance of you getting around to do a set of Predator variants, or some of the latest Boeing/Northrop UAVs when you tire of "wings"?
Yogi

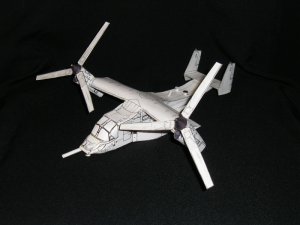
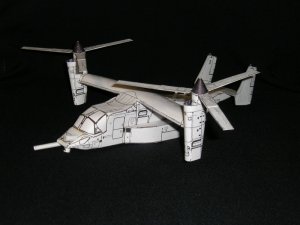
One of your designs (with a few odd 'n ends to better match the local USAF CV-22 versions). Currently doing duty in a local classroom - even more popular than rockets and spacecraft.
P3250029.jpg

P3250030.jpg
 
J

jagolden

Don't really know how to do that.

If I've misinterpreted your reply, please excuse this explanation.

Draw the model pieces in an application that is NOT raster based, but rather VECTOR based.
RASTER apps would be Photoshop, Paintshop Pro, or any paint-like app.
VECTOR apps would be Illustrator and the like.

The vector advantage is that the model can be scaled up or down without losing any of the sharpness or resolution.

When raster based programs are used, the model printout gets chunky and pixelated as it is enlarged.
 

clif52

Banned
Oct 23, 2004
129
4
16
Martinsville, Virginia USA
Well all I have is Photoshop, so I don't have much of a choice on the issue.
Hey Paragon I have redrawn a bunch of Photoshop files into Illustrator format if you need help for a model. In the vector format you can take the PDF files to a printer that has a poster printer and blowup the file as large as you want and print it out.
 

Paragon

Active Member
Apr 22, 2007
814
48
38
37
Greenville NC, USA
www.freewebs.com
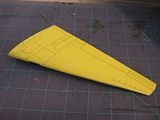
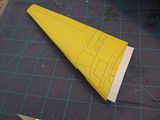
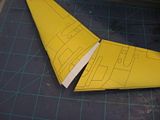
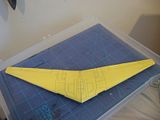
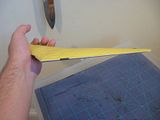
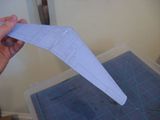
Well, finally something to show, though its not really much so far:


I have to say, I really like the simple elegance of this model so far. I think that the scale allows each wing to be a single sheet of card helps a lot, by allowing on, unbroken surface.

Mating the wings was a little bit of a puzzle for me. Usually, my models have fuselages for the wings to connect to, but this time, obviously, there was no such advantage. I decided to make a strip of tabs to go inside one wing. Then I applied glue, and squeezed the middle together flat. After the glue caught the top and bottom of the other wing, I just squeezed the front and back a little to "inflate" the shape.

You can also see the shape where the wings meet needs a little work, the seam there isn't completely sealed. Shouldn't be a big problem.

Current wingspan is 13 inches.
 
Might be worth making a "box" for the wing join (with a little spring in it to allow for builder "variation"). Squeezing it flat seems to risk bonding it flat if the glue seeps (I've been using Titebond II since that what's already in the shop - tacks up very quickly but it's not transparent so you have to be careful - no waiting for the glue to dry though, I can press on to the next step in less than a minute).
Yogi
 
Not an experienced engineer, but if you make the "box" with a top/bottom and two airfoil sides it will be rigid - the final fit will be subject to card thickness and builder variations. If it's more like an I-beam the wings can slide onto the outer (unsupported) ends of the box (flexible) and then tighten up and become rigid as they approach the center where the airfoil former is. In other words, one airfoil section in the middle with the top and bottom skins wrapped around it. Foil section could have tabs bent in alternating directions to give a strong bond to the skins. The outer ends are then free to deform and slip inside the wings. The shape forms itself correctly as the wing inner edge approaches the center airfoil form.
Might also use transverse reinforcement between the upper/lower box surfaces, though that would not maintain your airfoil shape as well.
That said, you have vastly more experience at this than I. Comment reflects some building "challenges" I've had with parts that need to be manually aligned or slip fits that require a lot of "fitting." I absolutely love the cone/cylinder connections that both self-align and shape.
Yogi
 
Status
Not open for further replies.