

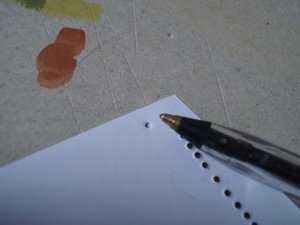
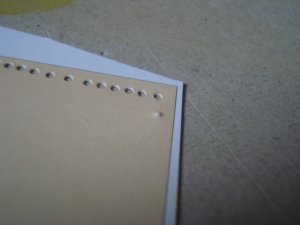
with the intention of adding the aforementioned detail to models(mainly armour) i purchased a screw punch and tested out the manufacture of scale rivets on the wreak of my mk 4 and parts of other kits it works fine i even have a trick to paint the edges of a whole bunch of tiny disks at once....but one thing that seems to be going wrong is that the little disks are de-lamiating which is anoying a makes them look unsightly is there any way to treat the source matirial(what the disks are cut from) to prevent this? onece on the model a coat of varnish will keep them together but they tend to do it in assembly ...any ideas?
de-laminating rivets?
- Thread starter NULLMOON
- Start date
You are using an out of date browser. It may not display this or other websites correctly.
You should upgrade or use an alternative browser.
You should upgrade or use an alternative browser.
- Status
- Not open for further replies.
Have you laminated the pieces? What kind of glue do you use?
I was using a transparent glue for the laminating process and the pieces also tend to delaminate, now I use white glue (wooden, not diluted) and it don't has happened to me anymore.
I hope it will help.
I was using a transparent glue for the laminating process and the pieces also tend to delaminate, now I use white glue (wooden, not diluted) and it don't has happened to me anymore.
I hope it will help.
Maybe putting some CA glue on the sheet and letting it soak in. It tends to darken the colours a bit. I have used CA glue before when pointy parts of an architectural model decided to delaminate. I have also coated the gear teeth on some mechanical models to strengthen them and keep them from delaminating. Test it out and see if it helps. ")
I have some experience in making rivets....I have done a few thousands.
The clue is to not use thicker paper than 0,2mm.Cardboard will delaminate.
The size/height of a rivet in real life is often less than 1cm,so 0,2mm in 1:25 scale isn't that far away.
So what I do is to use the screw puncher and make rivets out of the same paper thats in the kit.Often there are color samples in the kit for spare use if you mess up parts,so I just make rivets out of that.
I'm not sure that simply sticking card disks onto a model to represent rivets is the best that can be done. I looked at this a while ago and found a reasonable technique was:
- cut out the disks with a punch
- edge colour the disks
- shape the disks to a dome shape with an embossing tool. If there is a tendency to delaminate dip the emboss tool in diluted white glue then form the shape. The white glue seems to help the embossing and sticks the paper layers together.
- glue on model taking care not to flatten the shape.
Attached is an unfinished T-27 model with rivets made with this technique. The model looks crappy mostly because I had use flash to get an image.
Regards,
Charlie
Attachments

J
Jim Nunn
All small parts delaminate it is due to how they make paper, soft-core hard surface. What I have had good success with is “painting” the backside/unseen side of the paper with Future floor wax. Thanks to Peter Crow for this tip. Future appears to soak into the paper and bonds the fibers. I also use this method to stiffen up the paper to make fine cuts. The paper does not seen to tare as easily when you are cutting that strip of .5 mm paper.
All small parts delaminate it is due to how they make paper, soft-core hard surface. What I have had good success with is “painting” the backside/unseen side of the paper with Future floor wax. Thanks to Peter Crow for this tip. Future appears to soak into the paper and bonds the fibers. I also use this method to stiffen up the paper to make fine cuts. The paper does not seen to tare as easily when you are cutting that strip of .5 mm paper.
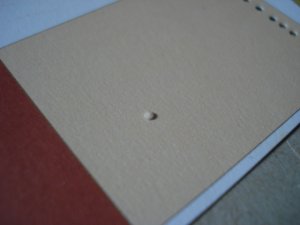
thanks ill give that a try the rivets on that t-27 dont look any different from the ones ive been making i did however find a method of making rivets rounder..by using an old biro to make a dent in the card on the reverse side and punching it out
Attachments
(...) i even have a trick to paint the edges of a whole bunch of tiny disks at once....
Surely you're not going to drop something like that without enlightening us?
Surely you're not going to drop something like that without enlightening us?
nothing to it i simply keep punching disks until the bit on the screw punch is full of them, i then take the bit out of the punch put it on a flat surface and carefully poke a cocktail stick down the cutting end... 8 times out of ten they stay together in a a little cylinder which i then paint before breaking them up into individul disks i can do up to 40 like this at a time with this method running a damp paintbrush over the matirial to be punched helps to keep them together:mrgreen:
Same topic - different method......
I was struck the other day by the Braille imprints on an aircraft boarding pass - I'd guess the boarding pass was 120gsm card - the Braille imprints were a perfect rivet shape.
Anyone know how this is done?
Regards,
Charlie
I was struck the other day by the Braille imprints on an aircraft boarding pass - I'd guess the boarding pass was 120gsm card - the Braille imprints were a perfect rivet shape.
Anyone know how this is done?
Regards,
Charlie
the biro method i posted earlier makes a simalar shape
Thanks for that great biro tip, as well as the one about painting the little stacks of discs as a single cylinder. Clever ideas! I am always looking for "mass production" techniques like that. When my screwpunch arrives, I'll try that one!
- Status
- Not open for further replies.