Mad Max Interceptor (paperinside.com)

Status
Not open for further replies.

gippolot

Member
Sep 18, 2006
52
0
16
Melbourne, Australia
www.users.on.net
The supercharger looks GREAT Jaffro.

Thanks for the pics of the Tumbler also, I hope it turns up somewhere again.

Off topic, I once owned a XC hardtop, (4.1 though), if only I had of put it into storage,... instead of selling it for an Alfa.

Nice build, as I said previously.

Andrew
 

elf

New Member
Oct 4, 2005
20
0
6
37
on the earth
wow that lil engine is cute....im still excited by my white edges showing engines....the edges are something im working one....but i just enjoy my stuff from a distance.....between my classes i have little time to perfect some stuff....but soon the holiday break will be here! and time will be with me.......yes....i hope to get to a level of constant perfection like the rest of you.....i want to be as good as many of you
 

Master-Bruce

Active Member
Aug 15, 2007
1,012
12
38
Hey Jaffro,

It's been almost a month. I know you're a big shot Moderator now. How about you remember us little people who still wanna see more of your great build? sign1

Seriously though, I guess you've become busy with the forum upgrades, don't forget to take some time for yourself and enjoy your model.

Lookin' forward to seeing more buddy. ;)
 

jaffro

Long term member
Jun 18, 2007
386
1
16
53
Melbourne, Australia
Skip, you must be a mind reader... lol.

Yes, the poor interceptor has been sitting neglected for nearly a month, but it just happens that I got to spend about 4-5 hours on it last night... i'll update with pics a bit later today, I've just woken up. :D
 

Master-Bruce

Active Member
Aug 15, 2007
1,012
12
38
Just woke up?! Ah, I forgot you were an Aussie. No worries look forward to seeing it buddy. ;)
 

jaffro

Long term member
Jun 18, 2007
386
1
16
53
Melbourne, Australia
Back into it, finally.

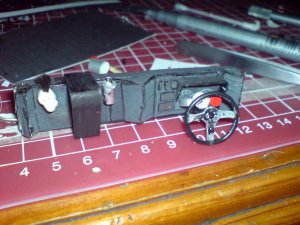
As far as the original model was going, the interior was done but I wasn't happy. Compared to the reference shots I found, it was looking a bit empty so i decided to add some bits to the dashboard seeing as this would be failrly visible through the missing windows.

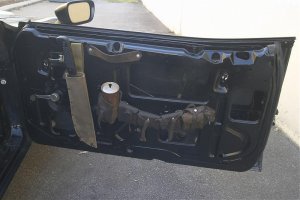
The drivers door was also looking a bit too plain, so I had a play around with a photo of the real door in paintshop pro and came up with a solution.

door1.jpg

I added a bit of 3D detail by cutting some holes and inserting a small strip of padding behind the printout when i glued it on.

door2.jpg

I added the custom fuel gauge and the red warning light thingy., some 3D detail and a visor to the drivers dash, and on the left I added the "triangle thing" (which used to hold the flashing blue light in the original Interceptor, before things got ugly). On either side of that are a "silver thing" I have no idea what it is but there's one in the real car, and the little voodo doll head type thing i made with plasticine and a small clump of cat hair that was obtained without any injury to the cat, or myself while obtaining it. :D

dash1.jpg

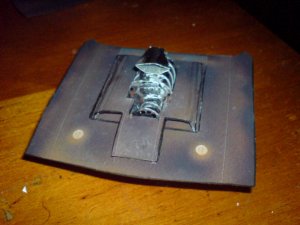
After that it was on to the hood, then in with the supercharger thingy.

hood1.jpg

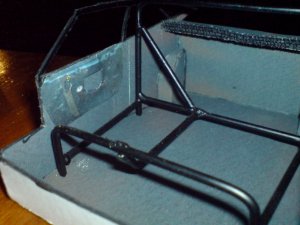
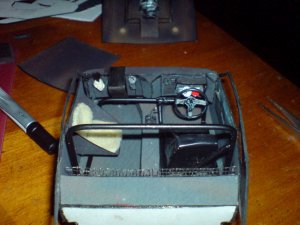
The interior is done for now, I may add a bit of junk where the back seat used to be before I close it up, but otherwise I'm happy with it so far. It's very rough and all my extra details are scratchbuilt and messy... but I'm learning along the way and ready to make a better job of the next project.

interior1.jpg

So now it's on to trying to make the body fit... I don't like my chances cos from the dry fits I've tried so far, nothing is going to match up easily. It's not the model that's at fault though, more to do with my choice of card thickness and sloppy cutting. :D
 

Master-Bruce

Active Member
Aug 15, 2007
1,012
12
38
Cat hair??!! I'll remember that one. I have 2, one black,the other white. :)

It's looking really good. I think for my next Claudio build I'd like to try the Delorean. Scale it up and customise the wheels to fold in for a BTTF II car. That was my favourite one.

Keep at it amigo.
 

jaffro

Long term member
Jun 18, 2007
386
1
16
53
Melbourne, Australia
I've spent so much time on the interior that it's all starting to come together quickly now, but i'm starting to make a mess of it. In future I need to learn to slow down and be patient on certain parts cos I seem to be messing things up towards the end of the actual part completion, or in most cases, when I'm building the second of 2 identical parts.

I finally tackled my first "real" windscreen/windows and they turned out better than I expected they would. I used some plastic sheet from the cover of a document binder thingy and glued the widow frames to it using plastic model glue and held them in place with pegs and clamps. The outer frame kept unsticking, so i held it in place with a rather too generous layer of white glue.
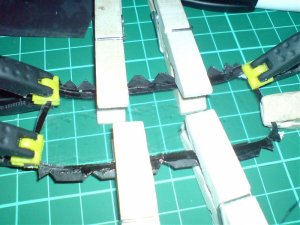
windscreen1.jpg

Here you can also see the finishing up of the side windows, the pillar between front and rear windows was out of line, between the inside and outside parts of the skin, and up around where the doorframe meets the windscreen so I removed some of the internal sections to make it easier to line it all up. In this next pic you can see before and after versions of the roof, more on that in a sec.
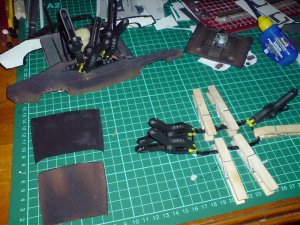
windsceen.jpg

While attaching the sides, shaping the roof and preparing the windscreen, it became pretty obvious that my choice of card thickness and dodgy cutting was definitely going to let me down. For starters the roof was way too small, mainly due to the one thing I didn't allow for when building my custom roll cage... the inward slope of the passenger and driver windows. To fix this I pasted the roof sections into paintshop pro and printed them out at 110% which made them way bigger than I needed, but bigger is better than smaller as long as i don't go too far with the trimming. :D

Just thought I'd throw in one more shot of the blower and hood, I took this one for my new avatar and it turned out better than the last ones I posted so why not.
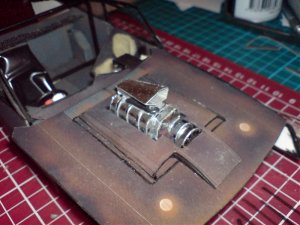
hoodavatar.jpg

By the time I got the roof on, the random glueprint and smudge gremlins had given the whole top section a good once over, and twice over, and once more for good measure. They then teamed up with Mr Macro to ruin my day.
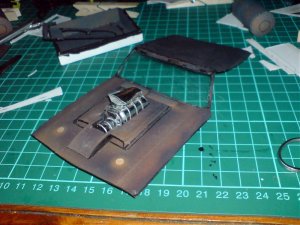
hoodscreenroof.jpg

The windscreen itself is pretty clean and smudge free, I'm happy with that but not the mess around it, which isn't helped much by the way the black marker i colour edges with stands out so much. I'd love to throw some putty or filler on it, sand it back and give it a nice spray job, but I'll save that kind of behavior for my next build. :twisted:

Moving right along, it was finally time to start on the "boot / trunk / bit where the big tanky things go", finally I was going to have somewhere to mount the tanks that have survived for nearly a month on the coffee table in the lounge room surrounded by kids, cats, a dog that likes to chew carboard toilet paper rolls and random gusts of wind from open windows and doors without a single scratch or dent. Did I accidentally knock the end off one when getting ready to mount it? YES!! Of course I did.
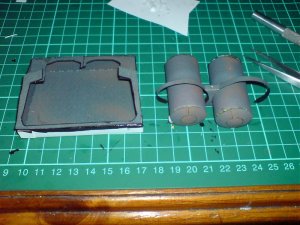
boot1.jpg

I lost a few of the bits that go on the tanks along the way, but that didn't bother me as I wanted to make some custom caps for them anyway, using a little bit of the silver card and some bits of black card for 3D detail and a handle. The tanks look a lot worse to me now that when i first made them a month ago... a lesson to be learnt when selecting the right way to colour edges. Not sure what the lesson is... not sure if I learnt anything, I still find it funny that they turned green and can't be bothered fixing it.
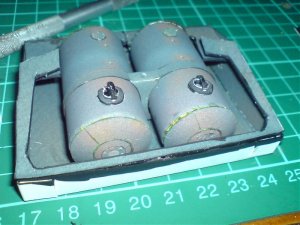
tanks3.jpg


So now I have to make the hood, windscreen and roof parts, which are now all one part, match up with the sides. There's going to be some trimming, some swearing, and some dodgy cover ups but I think I'll get through it ok and now the end is almost in sight.
 

Master-Bruce

Active Member
Aug 15, 2007
1,012
12
38
Well I think it's still lookin' pretty damn fine! :)

Edge colouring is the worst partm even with a black model, your choice of colouring tool will often stand out over the colour of the model parts. Especially when you photograph the build. Damn flash!

If the glue mess is from white glue, try gently scratching it off. I've done that before now and it often works to improve the model. Doesn't always come off though.

Don't give up buddy. :)
 

jaffro

Long term member
Jun 18, 2007
386
1
16
53
Melbourne, Australia
For my next build, I'm building from a white model then painting later so that won't be an issue, but in future printed builds i want to try a method I've seen spoken about a lot on these forums, which is basically to spray the printed parts in a clear lacquer or protective spray before building, as this allows wet glue to be wiped away with a damp cloth.
 

jaffro

Long term member
Jun 18, 2007
386
1
16
53
Melbourne, Australia
Do you mean the clips I use? I got them from what we call a "2 Dollar Shop" that just sells all sorts of junk... I've also seen them in various sizes in some hardware shops.
 

Janx

Member
Oct 2, 2007
132
1
16
You know you get those days/nights when you see something and go, I wish I could build like that. This was one of them :) superb.
 

jaffro

Long term member
Jun 18, 2007
386
1
16
53
Melbourne, Australia
Thanks for the compliment, although if you could see my latest smudged mess you might reconsider...

And now, a newsbreak,

Disaster has struck!! This build thread is in danger of extinction. Up until now, all the pictures in this thread have been taken on my mobile phone, which I just happened to lose 2 days ago while riding a bike, something I haven't done for years. Well now it's something I never want to do again.

I loved that phone, mainly for it's camera (3.2MP sony cybershot). We have a sony camera and a canon camcorder, both of which take pics but neither of which can be hooked up to a PC due to missing cables so it'll be a while before I can post pics here again. :(
 

Master-Bruce

Active Member
Aug 15, 2007
1,012
12
38
Dude! School boy error! Zip up the pockets next time! LOL

Seriously, sorry to hear that buddy. I've lost phones before now in far more stupid ways! It's very furstrating to say the least.

Sorry we won't be seeing more of it for a while too.
 

jaffro

Long term member
Jun 18, 2007
386
1
16
53
Melbourne, Australia
Thanks...

Ok, so the phone and its beloved camera are gone for good but the build still goes on. I'll try to edit some pics in here later.

The body is almost all on now but as I get to the last few panels i'm finding a lot of huge gaps and mismatched parts, where there shouldn't be gaps and parts should meet up.

This is not the model at fault, but rather my bending and shaping of the larger parts that was done to accommodate my thicker card and dodgy cutting.

it's still coming together well, and I got it down to the point where I just have to scratch build a new front end cos no amount of filler is going to fix the gaps I've created. :D

Speaking of filler, I'm starting to think about filling and airbrushing the body now, which I was trying to avoid, but it'll neaten up (ahhh, hide) the way it's looking now.

All that's left is the front end, the bottom and wheel wells, and some details... like spoilers, mirrors, and those pesky side exhaust pipes I haven't decided how to tackle yet.
 
Status
Not open for further replies.