Hey Bazookajo....
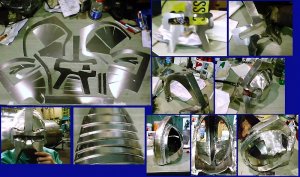
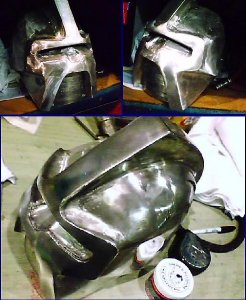
Neck piece is finished!
NOW WHERE"S THE BACKPACK?????????????? :twisted:
Seriously. Tell me you're developing it as we speak. No, tell me it's developed and I can start Beta building it. If not, I'll help! Are you using Meta/Pep to develop, or doing this by hand? With the references on wegottafindearth.com we seriously need to finish this set.
Can you tell I'm jazzed?

Okay, now for feedback.
Well designed, as was the helmet. Was a little puzzled by lack of instructions, but figured it's Beta... but then found they really aren't necessary. Nice labeling of the parts. Was very easy to assemble. Knocked the whole thing together, from print to finish, in 2 1/2 hours.
Only three issues I found.
One:
Joiner pieces R1 and L1. Maybe just me, but I couldn't make these fit no matter how I turned them. I ended up trimming off the top edge of each. No biggie, but you may wanna take a look at them.
Two:
Former piece(s) M5/M6. Honestly not sure that this is needed, given the card holds the proper shape pretty well. Plus, when the backpack is attached (HINT< HINT) this may be redundant.
Three:
Former piece M7/M8. I think the pointy ends of the "U" need to be slightly longer, as they were not long enough to close the entire length of M8's serrated edge where it joins with the tab for R10/L10. (Unless I somehow screwed the pooch on the joining, but I don't think so.) Easily cured by tracing a slightly larger part or trimming off the last two serration triangles.
Other than that, the only other thing is that it now SCREAMS FOR THE BACKPACK!!!!
Oh, did I say that already?
Oh, and yes, I'm working on the tutorial to build the LED eyepiece.