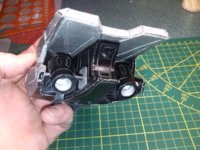
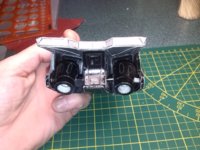
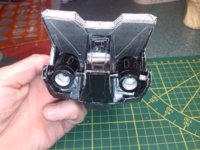
"PaperLaul's Terminator 2: Hunter Killer Aerial - by DanBKing"

Status
Not open for further replies.

DanBKing

Dan the Man
Feb 29, 2012
1,817
1,587
113
Netherlands
I am anxious to see some assemblies come together.

And so am I, Z, so am I !!!!

It seems as if my modelling has come to a grinding halt. I have got so much on my plate of life at the moment, that I am struggling to get to the dessert of modelling....... :(
ALL of my projects have stopped recently. But I do my best to get a little done here and there, and when I do, you people are the first to know about it ............;)

It is all about .....

 
  • Like
Reactions: Revell-Fan

zathros

*****SENIOR ADMINISTRATOR*****
Staff member
Administrator
Moderator
Apr 5, 2013
13,499
9,551
228
That version not available in U.S., so I loaded this one. ;)

 
  • Like
Reactions: DanBKing

zathros

*****SENIOR ADMINISTRATOR*****
Staff member
Administrator
Moderator
Apr 5, 2013
13,499
9,551
228
I'm at the same point. My real cars all need work as does my real house and just about everything else real. I have to build another computer as the motherboard fried my secondary one, Thank God my main computer is fine! Hope you can wrap things up, it never seems that's possible, and "10 years gets behind you, you missed the starting gun". :)
 
  • Like
Reactions: DanBKing

Revell-Fan

Co-Administrator
Staff member
Administrator
Moderator
Aug 1, 2009
11,595
12,338
228
Vreden
ALL of my projects have stopped recently. But I do my best to get a little done here and there, and when I do, you people are the first to know about it ............;)

:Drinks:

... from one lotgenoot to the other..! ;)

If people ask me what I wish for X-mas, I always say, A HUGE BAG OF TIME!!! :cool:
 
  • Like
Reactions: DanBKing

DanBKing

Dan the Man
Feb 29, 2012
1,817
1,587
113
Netherlands
Time

Something un-rewindable.
Something you can not waste.

These 4 letters sum up life.
Your life is how you spend your time.
Dedicate your time to things that deserve it.
To people who will love you on their time too.
Because remember.
This keeps going.

It doesn't freeze.
It won't stop.

It can make you lose control.
Make your head explode.
Time is all yours.
Life is your time.
It's not all going to be amazing,
but try to make most moments
the time of your life.


For everything there is a season,
And a time for every matter under heaven:
A time to be born, and a time to die;
A time to plant, and a time to pluck up what is planted;
A time to kill, and a time to heal;
A time to break down, and a time to build up;
A time to weep, and a time to laugh;
A time to mourn, and a time to dance;
A time to throw away stones, and a time to gather stones together;
A time to embrace, And a time to refrain from embracing;
A time to seek, and a time to lose;
A time to keep, and a time to throw away;
A time to tear, and a time to sew;
A time to keep silence, and a time to speak;
A time to love, and a time to hate,
A time for war, and a time for peace.


Ecclesiastes 3:1-8

:smoker:;)
 
Last edited:

DanBKing

Dan the Man
Feb 29, 2012
1,817
1,587
113
Netherlands
After wasting time, posting the last post, I took some pics, of 1/2 hrs work from last night........... And funnily enough, a little more time is lost, it seems .......:(

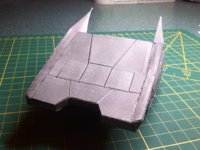
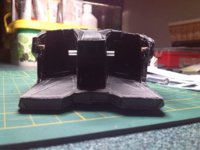
I fitted the roof of the nose, no problems ........

General_698.JPG

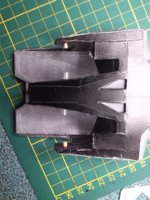
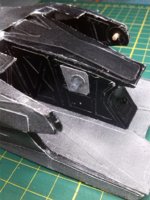
I checked the alignment of the spot light mounts across the bottom of fuselage..... No problem ........

General_699.JPG

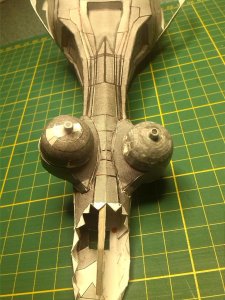
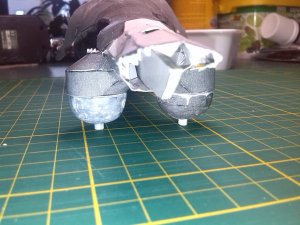
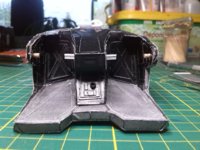
I checked the alignment of the spot light mounts from the front of the fuselage..... Problem........!!!!

General_700.JPG

They don't line up !!!!!!! Fitting the roof, has pulled things true.
Unfortunately, it seems my earlier measurements didn't ring true though....
The tubes in the nose are too high, by one diameter of the tube, therefore the spots would not be straight in that plane .... :headbange::headbange::headbange:

With the cheeks now built up, its gonna be awkward to get the fix done nicely........ But, with a bit of greebling and patience, I think I can fix it relatively simply.

It's just gonna take up more time.... :(
 

DanBKing

Dan the Man
Feb 29, 2012
1,817
1,587
113
Netherlands
Nice and straight......!

I fixed the problem of the skew spotlight mounts relatively simply. I slotted out the original hole by one diameter of the tube and made up some greebles to cover up the other half of the hole.

General_703.JPG

Much better...!!

General_701.JPG

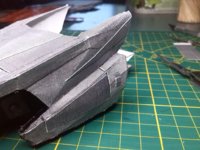
I added some greebles and panels to the sides of the head too.

General_702.JPG

And once everything was dry, time for a test fit, for the first time, of the spotlights......

General_704.JPG General_705.JPG General_706.JPG

I think that looks fine...! :biggrin:

I have a little greebling and panelling to finish off on the bottom of the head. Once this is done, the whole assembly will be cleaned up and sprayed with a couple of coats of primer. Once the paper is sealed in this way, then I can harden joints, sand and smooth everything, maybe with a little filler here and there........ Then it will get a couple of final coats of primer, when I am happy with the finish. I will post some pics before it goes off to get the spotlights and the recesses chromed.

See ya'll when I can..... :)

:wave:
 

Tonino

Well-Known Member
Apr 15, 2004
791
1,775
83
61
Republic of San Marino
www.facebook.com
It's always a pleasure to see a mistake fixed. Nice result. :)
Like you I feel the NEED to put things in place as soon as possible to start seeing the shape of the assembly. This is going very well.
Looking forward for the metal!!!!
thumbsup
 
  • Like
Reactions: DanBKing

DanBKing

Dan the Man
Feb 29, 2012
1,817
1,587
113
Netherlands
A Little Bit of This, and a Little Bit of That...! ~ Carolyn Dawn Johnson

Even though it has been over 3 weeks since I have posted anything in this thread, rest assured there has been work going on in the background, when life has permitted me ......:cool:

I finished off the panelling work on the head assembly, and sanded and smoothed things out, with a little filler and various grits of sandpaper. The spotlight recesses were then given a few generous coats of primer. The rest of the head assembly was then masked off, so that the recesses can go and get chromed and clear-coated, along with the spotlights.
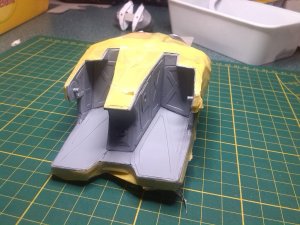
General_711.JPG

I am patiently awaiting their return .....! ;)

In the meantime, I started working on the leg mounting pods at the rear of the fuselage. These pods will be under load stresses when the model is standing on its legs. I want to transfer these load stresses from the legs, through the pods, directly onto the internal former/frame, thereby eliminating any stresses on the fuselage shell itself. Back in post #180, I showed how I made up the pods. I now have a completed set of two.
After careful measurement, I cut slits in the upper mounting pieces of the pod assemblies and cut corresponding slits in the fuselage mounting pieces, as well as a slot in the internal former/frame. These slits will accomodate a thick cardboard 'bar.'
Things will become a bit clearer in a minute.....
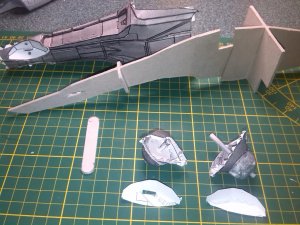
General_707.JPG

The actual pods that the legs mount to, have a rolled paper tube running through them. One end of the tube will later be glued into the leg. Once the leg is attached, all the stress will be transfered to the tube, instead of the pod itself. I stuffed a thin wooden dowel down the tube to really give it strength! The tube was then pushed through the hole in the pod-to-fuselage mounting assembly.
I then glued a disk to the tube only, which will stop the pod falling off, but still allowing it to rotate.
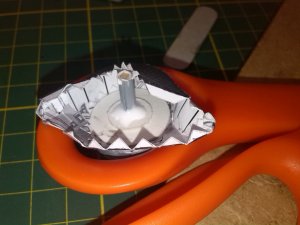
General_710.JPG

Once these were dry, I made accurate measurments and cut the tube to length. Eventually, the ends of the cardboard bar will pass through the cut slits and be glued to the top part of the pod assembly. The end of the pod tube will push on the bottom of this bar, thereby transfering the load stresses from the tube to the bar. Hopefully the next pic will clarify this....
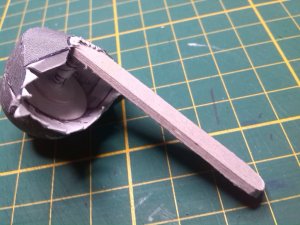
General_709.JPG

Next up, I attached the pieces on the rear of the fuselage where the wings mount to. I cut a hole for the wiring from the wing tip lights. I left the fuselage open at the bottom to allow access when gluing the wings. The three parts that close up the bottom rear of the fuselage will be added later when the wings are attached, the wiring run and I am satisfied with everything!
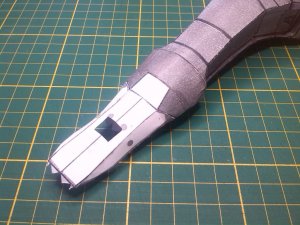
General_712.JPG

I put the internal former/frame in position in the partially completed fuselage to test fit everything.
First the bar was inserted through the fuselage as shown in the pics below, making sure everything was square and perpendicular.
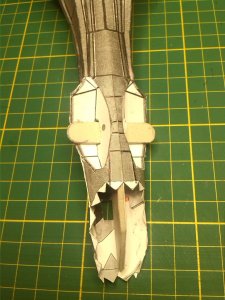
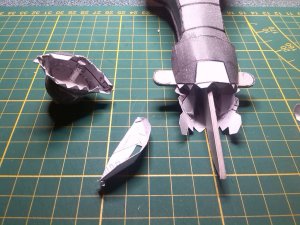
General_713.JPG General_708.JPG

I finished off the assembly of the pods and dry fitted the pods in position on the fuselage, carefully making sure the ends of the bar sat correctly above the pod tube.
I am very pleased with the result........ The mounting is really strong and stable!

One thing I think we can safely say: This is definately a male bird ..... :D :D

General_714.JPG General_715.JPG

I then started on building up the middle section of the fuselage where the engines mount to ..... Nothing special here, just edge-gluing and back-tabbing all the joints .........
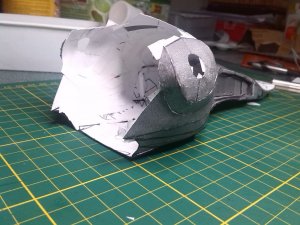
General_716.JPG

I will be back soon with more. I have been informed that I will be getting the nose section of the fuselage back from chroming tonight. Once I have fitted the spotlights, I will take some pics and post them here in the next day or two.

See ya all around ....... :)

:wave:
 

zathros

*****SENIOR ADMINISTRATOR*****
Staff member
Administrator
Moderator
Apr 5, 2013
13,499
9,551
228
Dan, looks you you've picked up quite a head of steam, she's coming round!! :)
 
  • Like
Reactions: DanBKing

DanBKing

Dan the Man
Feb 29, 2012
1,817
1,587
113
Netherlands
@Revell-Fan

“Rivers know this: there is no hurry. We shall get there some day.”

A.A Milne - Winnie-the-Pooh.


"Pleasure in the job puts perfection in the work."
Aristotle

;)
 
Last edited:
Status
Not open for further replies.