V.i.n.cent - The Black Hole - Building Thread

starbuck

Well-Known Member
Aug 15, 2013
898
1,825
93
Austria - Carinthia
No stand included, unfortunately.
--------------------------
I mentioned that I will make a second one as present - starting from the bottom. As can be seen the original attached part does not fit to the feed-holders.
You can see on pic 3 and 4 that the bottom part does not have the same size on the right and the left side. Additionally both sides are too small.
So I tried to make a bottom part that suits. Size is OK now checking where and how to get the colour.
Additionally I dublicated the ends to have a complete set for the feed-holders.
 

Attachments

  • IMG_0416.JPG
    IMG_0416.JPG
    837.1 KB · Views: 7
  • IMG_0417.JPG
    IMG_0417.JPG
    1.2 MB · Views: 7
  • IMG_0421.JPG
    IMG_0421.JPG
    901 KB · Views: 7
  • IMG_0422.JPG
    IMG_0422.JPG
    900.9 KB · Views: 7
  • IMG_0424.JPG
    IMG_0424.JPG
    693.5 KB · Views: 7

starbuck

Well-Known Member
Aug 15, 2013
898
1,825
93
Austria - Carinthia
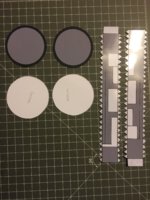
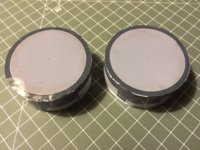
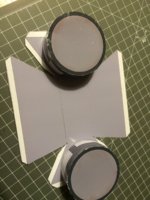
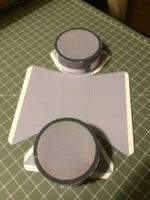
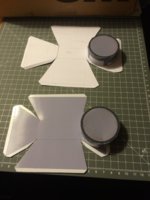
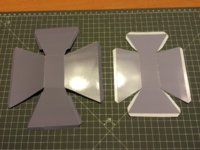
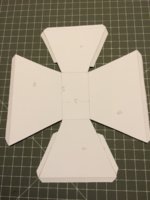
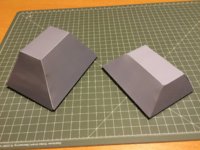
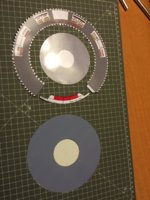
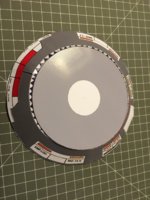
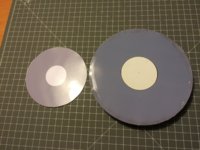
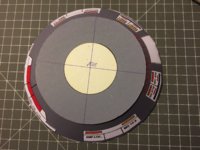
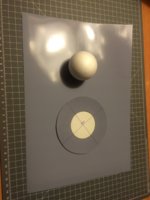
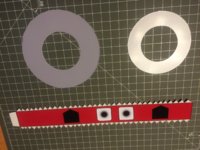
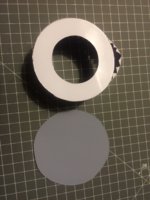
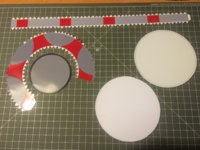
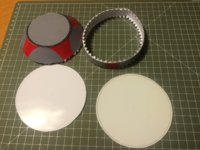
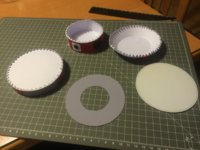
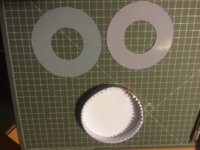
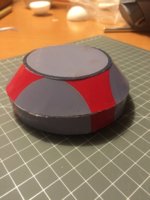
@starbuck With the short amount of experience that I have in modelling with paper/card, I have found that when attaching a conical shape to a ring shape, (like most of your model,) that it really helps if you can find, or make, a former that keeps the ring perfectly round while gluing the conical part. Because, if the ring or the cone, are not truly round, it throws the whole final shape out of alignment.
One of my biggest aids in attaching rings and cones together is the trusty circle template. You can see many examples of the use of the circle template within my "Discovery" build......;)

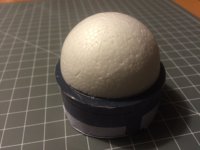
A small 'tip' that has helped me immensely. I hope it will help you too....
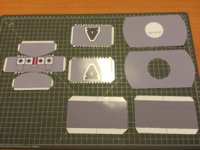
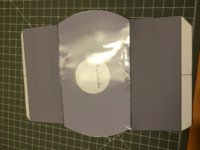
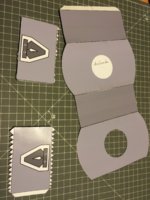
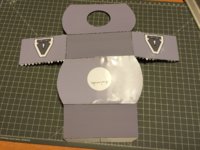
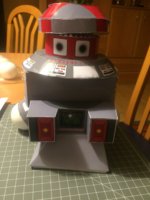
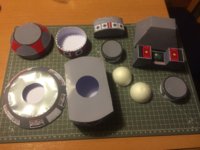
 :D

Thank you very much for the tip. It is a brilliant idea and I will try to find some stable former.
@ discovery :Bravo::Congrats::bowdown:
 
  • Like
Reactions: DanBKing

Revell-Fan

Co-Administrator
Staff member
Administrator
Moderator
Aug 1, 2009
11,595
12,338
228
Vreden
I am really looking forward to the result. It would be great if you could document your progress and make an "illustrated build diary" which can be used for reference because I haven't found any instructions for the model. Obviously the model was designed without CAD which may explain the fitting issues. :)
 
  • Like
Reactions: Sky Seeker

zathros

*****SENIOR ADMINISTRATOR*****
Staff member
Administrator
Moderator
Apr 5, 2013
13,499
9,551
228
As I see the thread has taken off rather well, I decided to no loionger consider it a "threat", and renamed it to "thread". ;)

Nice subject. Weird movie, kind of ahead of it's time as many scientists weren't agreement about the existent of these things, but anything with Yvette Mimeaux in it is worth watching. ;)
 

starbuck

Well-Known Member
Aug 15, 2013
898
1,825
93
Austria - Carinthia
As I see the thread has taken off rather well, I decided to no loionger consider it a "threat", and renamed it to "thread". ;)

Nice subject. Weird movie, kind of ahead of it's time as many scientists weren't agreement about the existent of these things, but anything with Yvette Mimeaux in it is worth watching. ;)
threat vs thread :lolsign: one letter big impact
 

starbuck

Well-Known Member
Aug 15, 2013
898
1,825
93
Austria - Carinthia
Food Holder finished.
First pic shows the both footholders - left my version - right the original version.

Second pictrue show the first attempt of my own version and the measurements in cm. As can be seen the mesurements are not exactly the same in this version. I made an accurate one were the measurements are the same on every side. Then I took a snapshot of the original one to get the correct color, and printed as A4 page - then I drew the measurements on this page to get the colored version.

Last pic tries to show the difference between the original version and mine.
 

Attachments

  • IMG_0428.JPG
    IMG_0428.JPG
    1.6 MB · Views: 6
  • IMG_0429.JPG
    IMG_0429.JPG
    1.4 MB · Views: 7
  • IMG_0432.JPG
    IMG_0432.JPG
    1.8 MB · Views: 6

starbuck

Well-Known Member
Aug 15, 2013
898
1,825
93
Austria - Carinthia
Next: Middle Block:

Pic 1 all parts cut - middle part I only cut once - it is good to be able to fix the glueing tabs - no necessity to do it on both sides
Pic 2 and 3 assembling start - you can see also here the part do not fit exactly - no problem so far - correction later on
Pic 4 side parts attached.
Pic 5 and 6 result of coming together - I started to glue the sideparts together before attaching top and bottom. - Then I saw that top and bottom will not
match exactliy the curve of the sideparts - so I attached without trying to match the curves - knowing that I will have some overlapping part - which I will have to cut
Pic 7 back part of the midlle part
Pic 8 all the peaces so far
 

Attachments

  • IMG_0431.JPG
    IMG_0431.JPG
    1.7 MB · Views: 8
  • IMG_0433.JPG
    IMG_0433.JPG
    1.3 MB · Views: 9
  • IMG_0434.JPG
    IMG_0434.JPG
    868.1 KB · Views: 9
  • IMG_0435.JPG
    IMG_0435.JPG
    1.7 MB · Views: 8
  • IMG_0436.JPG
    IMG_0436.JPG
    869.7 KB · Views: 9
  • IMG_0437.JPG
    IMG_0437.JPG
    703.3 KB · Views: 9
  • IMG_0438.JPG
    IMG_0438.JPG
    1,008.6 KB · Views: 8
  • IMG_0441.JPG
    IMG_0441.JPG
    1.6 MB · Views: 9

starbuck

Well-Known Member
Aug 15, 2013
898
1,825
93
Austria - Carinthia
but......
the "torso": as can be seen on picture 2 the upper part is a little too smal - therefore made a correct part with an external diameter of 10,5 cm

again (no photo so far) printing of the correct color on an A4 cover and cutting the part out of it - pictures to follow
 

Attachments

  • IMG_0444.JPG
    IMG_0444.JPG
    971.3 KB · Views: 7
  • IMG_0446.JPG
    IMG_0446.JPG
    918.2 KB · Views: 7
  • IMG_0447.JPG
    IMG_0447.JPG
    1.5 MB · Views: 6
  • IMG_0449.JPG
    IMG_0449.JPG
    1.8 MB · Views: 6

starbuck

Well-Known Member
Aug 15, 2013
898
1,825
93
Austria - Carinthia
One thing before: I tested all the parts whether they fit - if not procedure as described above. Don´t know maybe my printer is responsible for the trouble and not the model. Sometimes I have the feeling that it does not print the size wished altough I use always the same settings.

Nevertheless: next parts ....and my styrofoam balls arrived. (see picture 2)
In sum no problem in finding parts together but ...fitting issues. But now I am professional and i am able to create additional parts very fast.
 

Attachments

  • IMG_0451.JPG
    IMG_0451.JPG
    726 KB · Views: 3
  • IMG_0452.JPG
    IMG_0452.JPG
    1.2 MB · Views: 3
  • IMG_0453.JPG
    IMG_0453.JPG
    904.2 KB · Views: 4
  • IMG_0454.JPG
    IMG_0454.JPG
    833.3 KB · Views: 4
  • IMG_0455.JPG
    IMG_0455.JPG
    752.3 KB · Views: 4
  • IMG_0456.JPG
    IMG_0456.JPG
    747.2 KB · Views: 3
  • IMG_0457.JPG
    IMG_0457.JPG
    844.5 KB · Views: 4

starbuck

Well-Known Member
Aug 15, 2013
898
1,825
93
Austria - Carinthia
.....and next - nearly final parts - the hat.

@DanBKing - I did not forget your tip - I just did not find time to search for formers. I mentioned before it is a present and it has to be ready by the end of the week together with another one.
So I spend all my time to finalize the presents.

Also here no problem in finding parts together. In the first run (from above to below) it was much more complicated, as I cut out to many parts in one session.
 

Attachments

  • IMG_0458.JPG
    IMG_0458.JPG
    1.7 MB · Views: 4
  • IMG_0459.JPG
    IMG_0459.JPG
    1.5 MB · Views: 4
  • IMG_0458.JPG
    IMG_0458.JPG
    1.7 MB · Views: 5
  • IMG_0459.JPG
    IMG_0459.JPG
    1.5 MB · Views: 5
  • IMG_0460.JPG
    IMG_0460.JPG
    1.6 MB · Views: 6
  • IMG_0461.JPG
    IMG_0461.JPG
    870.3 KB · Views: 5
  • IMG_0462.JPG
    IMG_0462.JPG
    751.9 KB · Views: 5